RESTful API Authentication for Catalina’s API for SL
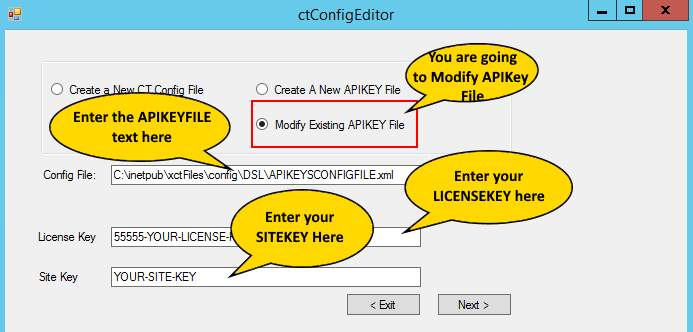
Catalina’s RESTful API for Dynamics SL uses BASIC authentication. You can manage your authentication using Catalina’s ctConfigEditor.exe tool. This is normally installed on the API Web server in the c:\inetpub\xctFiles\ctConfigEditor folder. It may be different on your server so you may need to contact your IT administrator. The executable is ctConfigEditor.exe.
You will first need a few pieces of information from the web.config file of your ctDynamicsSL folder (the location where Catalina’s web services/API resides). The folder is normally located at: c:\inetpub\xctFiles\web\ctDynamicsSL. But could be in another location based on your server setup. You may need to contact your IT administrator to find out where it is.
Looking in the web.config, you should see several keys in the appSettings section that is required for ctConfigEditor to be able to read your authentication file:
- LICENSEKEY
- SITEKEY
- APIKEYFILE
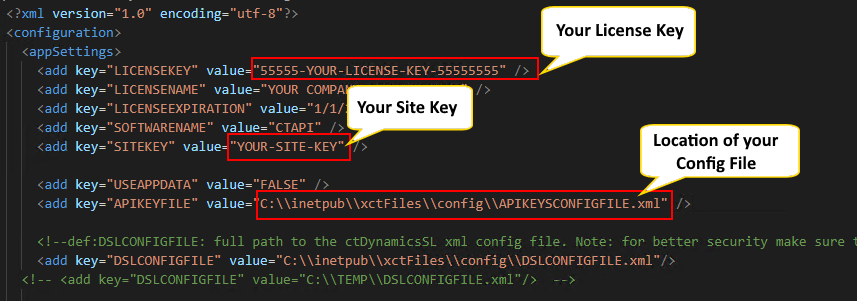
Once you have your licensekey, sitekey, and apikeyfile, you can run the ctConfigEditor tool.
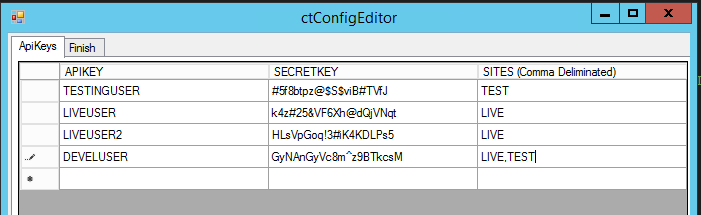
- APIKEY: this is the username that the user would be using in the RESTful API basic authentication
- SECRETKEY: this is the password that the user would be using in the RESTful API basic authentication
- SITES: This is a comma delimited list of sites the user can access
So, in the above example, I have 4 users
- TESTINGUSER: This user can only access the TEST site
- LIVEUSER and LIVEUSER2: These users can only access the LIVE site
- DEVELUSER: this user can access both the LIVE and the TEST site
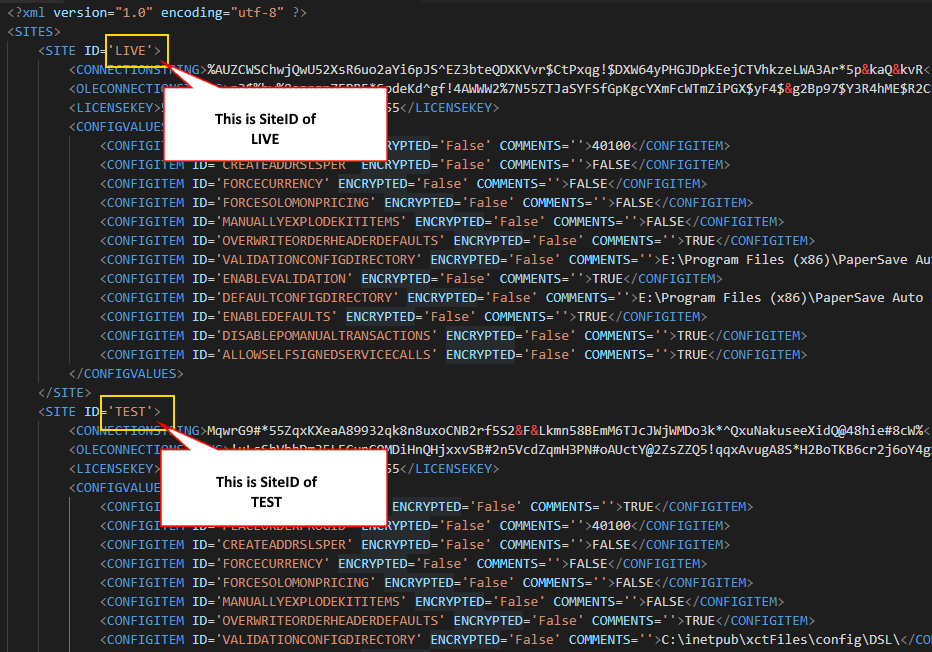
NOTE: Sites are basically configurations in Catalina’s API that point to different database strings and configurations. If you look in your web.config file, of the ctDynamicsSL folder, you can see an appSettings key called DSLCONFIGFILE. This is the location of a configuration file that has all the different sites setup. Below is an example of what a DSLCONFIGFILE would look like. You can see that there are 2 separate sites. Each with their own connection strings and configurations.
NOTE: Do not change your DSLCONFIGFILE unless you intend to change settings. This tutorial is NOT about DSLCONFIGFILE but about your API Keys.
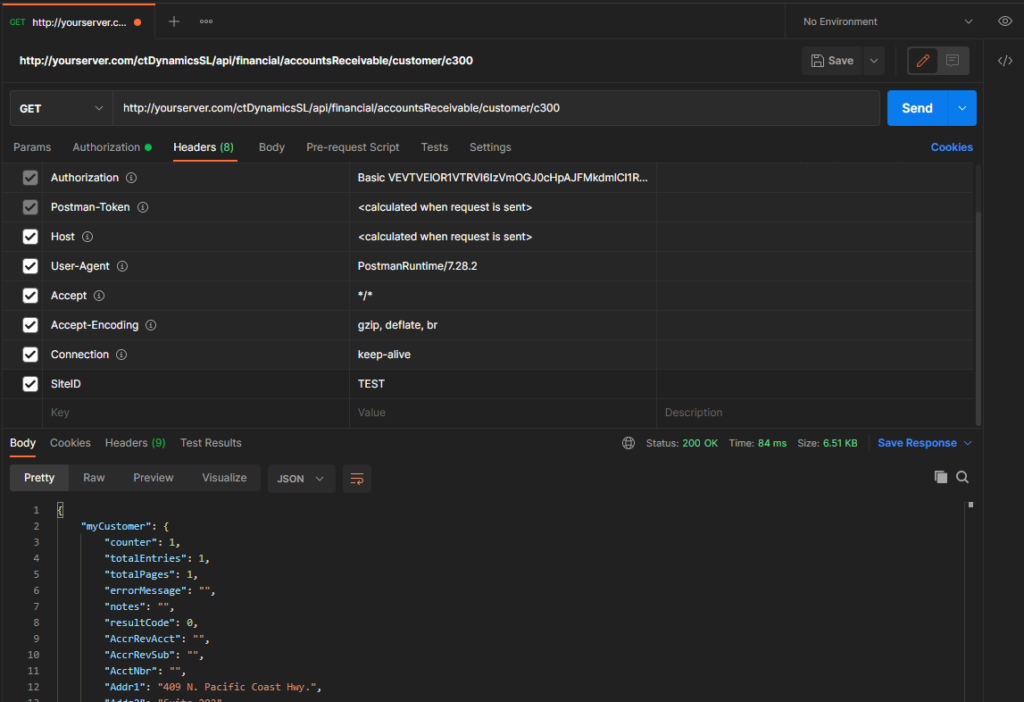
So, now that we have our API Keys setup, lets do an example. If we want to use the following:
- Use the TESTINGUSER API Key (with it’s password of “#5f8btpz@$S$viB#TVfJ”)
- We are going to use the TEST SiteID
- We will have a server name of yourserver.com
- We want to retrieve the Customer “C300” from SL using the customer endpoint
The curl code would look the following:
curl --location --request GET 'http://yourserver.com/ctDynamicsSL/api/financial/accountsReceivable/customer/c300' \
--header 'SiteID: TEST' \
--header 'Authorization: Basic VEVTVElOR1VTRVI6IzVmOGJ0cHpAJFMkdmlCI1RWZko='
NOTE: to create the authorization string, you would take the username and the password and create a string like this: “TESTINGUSER|#5f8btpz@$S$viB#TVfJ” and then base64 encode it. You will get the following value: VEVTVElOR1VTRVJ8IzVmOGJ0cHpAJFMkdmlCI1RWZko=
To create the header for “Authorization.” Take the base 64 encoded value and put “Basic” in front of it. Your end result would be the following: “Basic VEVTVElOR1VTRVJ8IzVmOGJ0cHpAJFMkdmlCI1RWZko=”
Looking at it in Postman looks like the following: