ctConfigEditor is the stand-alone executable used to create and edit the custom XML documents used to configure our full line of web services. Our xml structure supports storing sql connection data and a range of name/value pairs. All data is easily encryptable for added security.
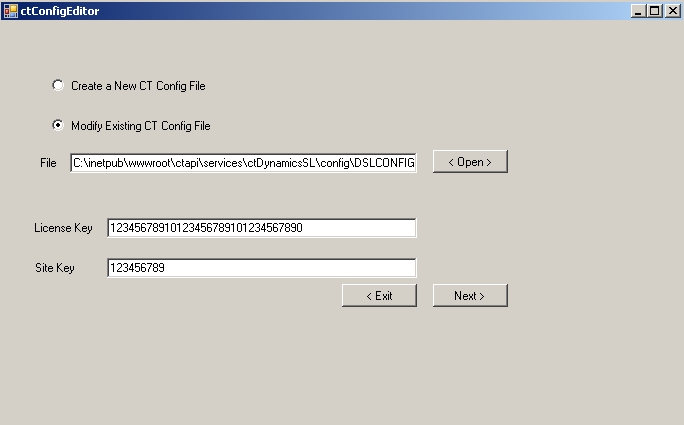
Step 1:
Choose whether you are editing an existing file or creating a new config file from scratch. If loading an existing config file, you will need to fill in your catalina software license key as well as your sitekey.
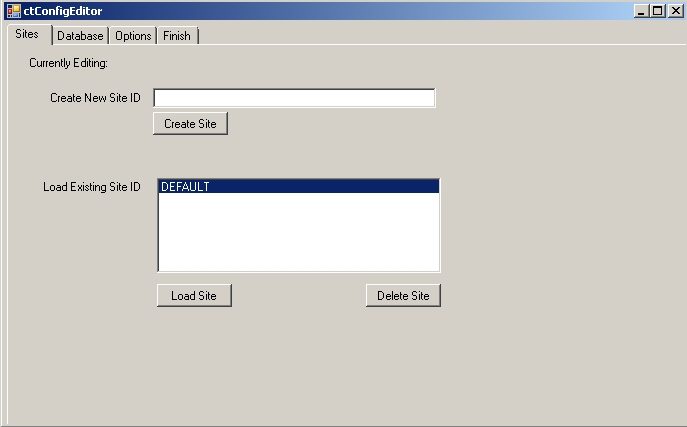
Step 2:
Either load an existing Site ID or create a new Site ID. You can identify which Site ID you are editing on all screens at the top of the screen where it says, “Currently Editing: SiteID“. If this value is blank, it means you are creating a new SiteID entry. Note: TO DEFAULT ALL KEYS: Load an existing Site ID, then enter a New Site ID and hit the “Create Site” button.
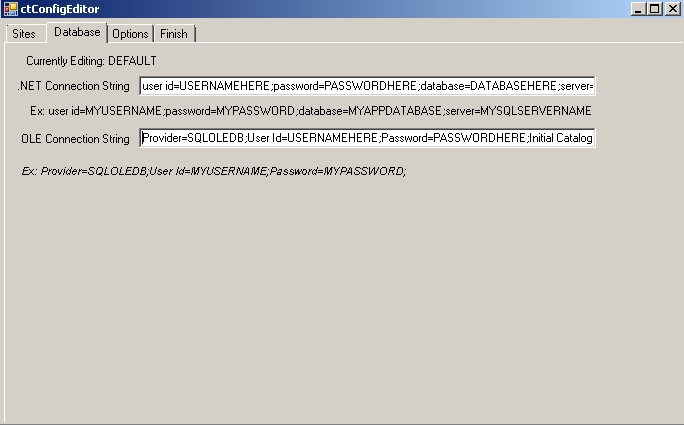
Step 3:
Set your Database connection strings. Both the .NET format and OLE String format. .NET Format: user id=USERNAMEHERE;password=PASSWORDHERE;database=DATABASENAMEHERE;server=SERVERNAMEHERE OLE Format: Provider=SQLOLEDB;User Id=USERNAMEHERE;Password=PASSWORDHERE;Initial Catalog=DATABASENAMEHERE;Data Source=SERVERNAMEHERE For more information on sql connection strings and other options available, we recommend reading at: http://www.connectionstrings.com/
Step 4:
Edit the config options available or create custom entries. Note: you can optionally encrypt any field by just checking the “encrypt” checkbox next to a key. We recommend only encrypting sensitive data.
Step 5:
On the “Finish” tab you will see the option to Preview the XML file or Save it to a file. Click the appropriate button. You can optionally change your siteKey/encryptKey by filling in the new key in the SiteKey text field. Note: You will need to remember to update any client applications to use the new siteKey.
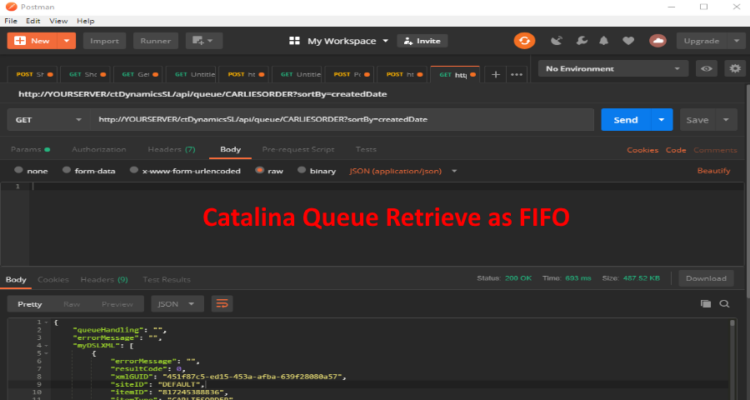
If you use the Catalina Queue Engine for queuing records, you might want to retrieve data in a FIFO (First In First Out) method. This means you want to grab the oldest records first. This is easily accomplished by calling the Catalina Queue API with the parameter sortBy in the query string.
Example, if you are retrieving the queue ORDERS, you would format your URL, for the Queue API, like this:
If you are going to use our userMaintenance web service, to manage SL user logins, it will also need: db_securityadmin db_accessadmin
Also note that by default, we normally install our scripts under the dbo schema. So, you also have to give the user, we are connecting as, execute on that schema.
eg. grant execute on schema :: [dbo] to usernamehere
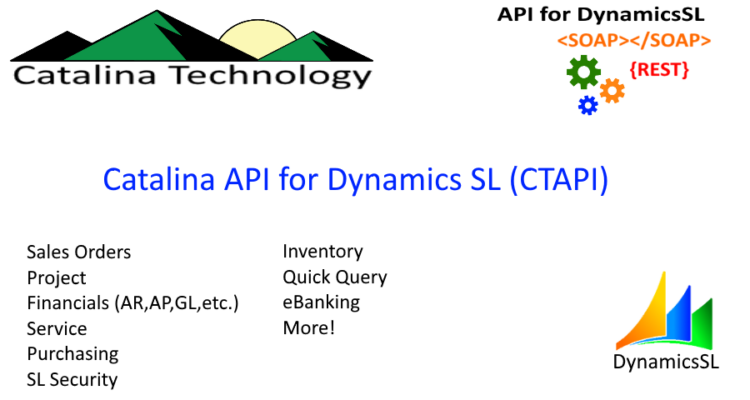
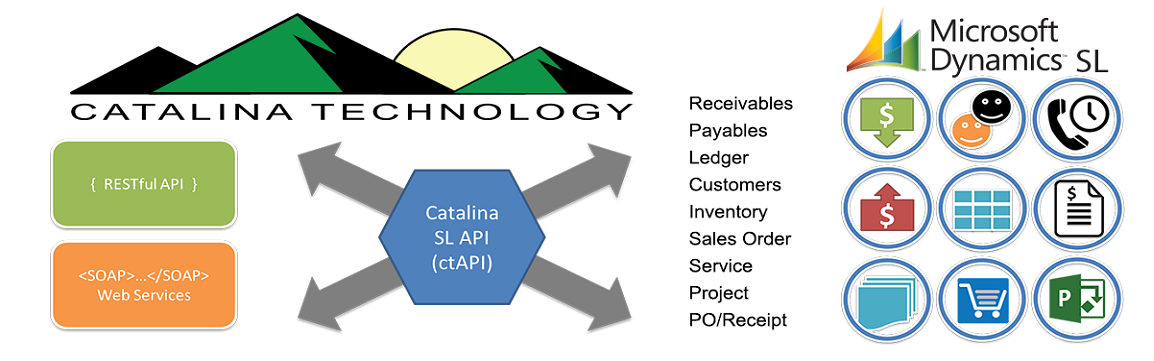
Catalina’s evergrowing list of API’s for Dynamics SL increases your capabilities to integrate other systems and apps to SL quickly and easily with modern API technology.
How many times have you wanted to just make a SQL call from an app, website, or other system, but you don’t have direct access to a SQL connection or other easy method to call SQL?
Well the Catalina API for Dynamics SL has a secure way for you to make SQL calls over to your SL database using the Catalina common.asmx web service call.
Below is a quick tutorial on how to do this using .NET and the Catalina API for Dynamics SL (SOAP calls) Continue Reading →
Catalina Technologies API for Dynamics SL allows you to create your own custom defaults and validations when sending data into SL through the API.
How to set Custom Defaults and Validations for web services in CTAPI. As of RELEASE builds post 2017/1/1, you are now able to overwrite defaults and validations in two single files. This is now the preferred place to make customizations, as it will avoid overwriting changes with new release builds of CTAPI.
The file for Defaults customizations is named: custom.default.ctDynamicsSL.xml and is located in your DEFAULTCONFIGDIRECTORY. (Path defined in your DSLCONFIGFILE, default: c:\inetpub\xctFiles\config\)
The file for Validations customizations is named: custom.validate.ctDynamicsSL.xml and is located in your VALIDATIONCONFIGDIRECTORY. (Path defined in your DSLCONFIGFILE, default: c:\inetpub\xctFiles\config\)
All customizations for defaults and validations for all CTAPI web services are contained in these two files.
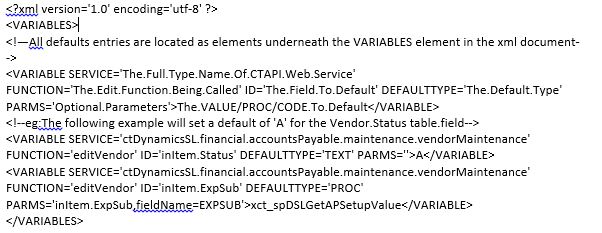
Definition of the custom.default.ctDynamicsSL.xml file:
ID: (The field to set)
1. inItem – Always used to represent the Table/Object being defaulted. (not the field)
DEFAULTTYPE: (TEXT, PROC, CODE)
1. TEXT – sets the field value to the value listed in this xml element.
2 PROC – sets the field value to the value returned by the stored procedure listed in the xml element value. (optional: PARMS attribute listing stored procedure parameters)
3. CODE – sets the field value to the value returned by performing an eval on the code listed in the xml element value.
PARMS: (An optional, comma-delimitated list of parameters used for PROC Type defaults)
1. Variables from the inItem object that match stored procedure variable names.
e.g.: PARMS=’inItem.Status’
2. Rename an inItem object variable to a different stored procedure variable name.
e.g.: PARMS=’VendStatus=inItem.Status’
3. Hardcoded Stored procedure variable values.
e.g.: PARMS=’Active=1’
Definition of the custom.validate.ctDynamicsSL.xml file:
ID: (The field to set)
1. inItem – Always used to represent the Table/Object being defaulted. (not the field)
VALIDATETYPE: (LIST, PROC, NUMBERRANGE, DATERANGE, CODE)
1. LIST – a comma delimitated list of text values that are valid.
2. PROC – validates based on returnValue returned by the stored procedure listed in the xml element value. (optional: PARMS attribute listing stored procedure parameters)
3. NUMBERRANGE – a comma delimitated range of doubles.
e.g.: 1,5
4. DATERANGE – a comma delimitated range of dates.
e.g.: 1/1/2016,1/1/2019
5. CODE – validates the Boolean returned by performing an eval on the code listed in the xml element value.
PARMS: (An optional, comma-delimitated list of parameters used for PROC Type validations)
6. Variables from the inItem object that match stored procedure variable names.
e.g.: PARMS=’inItem.Status’
7. Rename an inItem object variable to a different stored procedure variable name.
e.g.: PARMS=’VendStatus=inItem.Status’
8. Hardcoded Stored procedure variable values.
e.g.: PARMS=’Active=1’
With this model in mind, all such services have a screen() object designed to match the schema of the comparable SL screen. E.g., In the Vendor Maintenance (03.270.00) SL screen, there is one SQL table referenced for reading and editing (Vendor). This is represented by the myVendor variable of type ctDynamicsSL.Vendor inside the screen. Also included is one read-only calculated object myBalances of type ctDynamicsSL.AP_Balances.
Note: All object/table names and property/field names will match for both capitalization and naming.
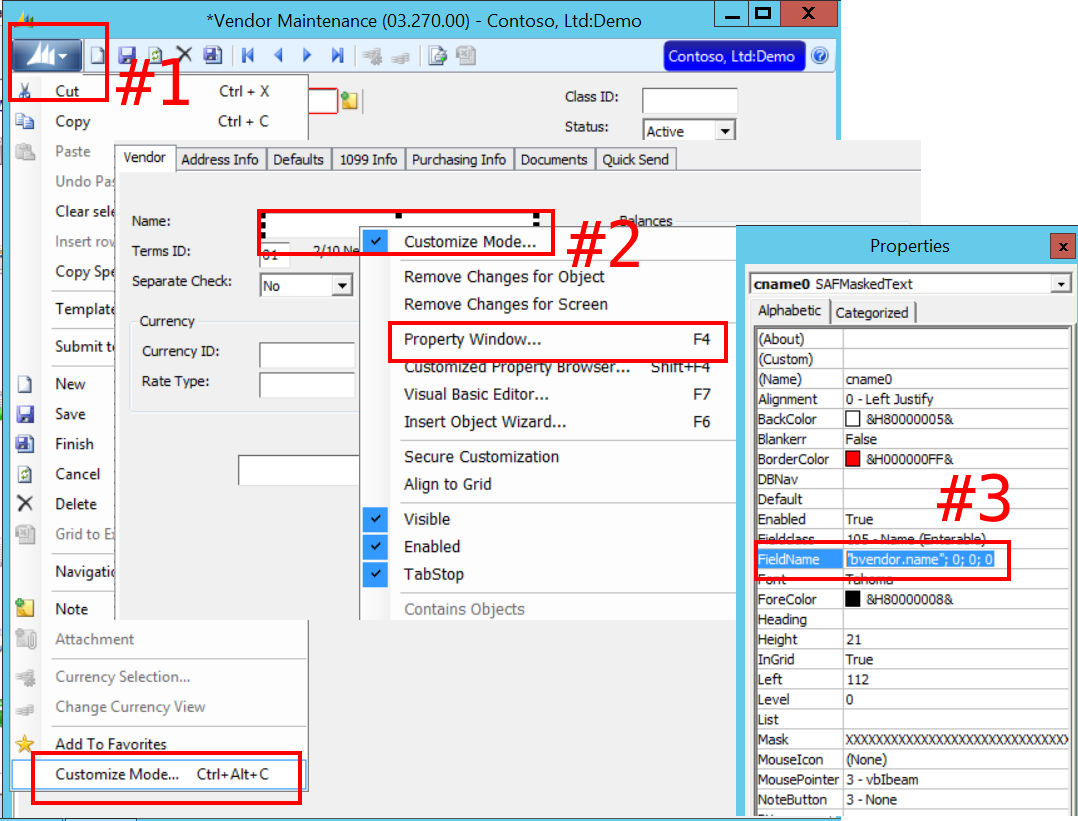
Pro-tip: If you need to know which field to populate in the SL screen() objects, you only need to pull up Customization Mode in SL (Ctrl + Alt + C), locate the field and its name in the Property Window (F4), then find the FieldName. This FieldName correlates directly to a Table.Field and Object.Property in the screen() object.
e.g.: The following SL screen field correlates to:
In addition to the SL fields, all objects contain: public String errorMessage.
The errorMessage field defaults to a blank String “” and if populated, means that the system ran into an error during processing.
Note: when editing a screen object, any errors editing contained objects will bubble up to the screen level so it is only necessary to check the top object.
e.g.: if (!String.IsNullOrWhiteSpace(myScreen.errorMessage)){/*we ran into an error*/}
Populating a screen object with defaults:
Every web service with a screen() object contains a public screen getNewscreen(screen inTemplate) call. This call will take the passed screen() object and return a copy with all default fields populated/overwritten.
Note: you can pass a null to get a completely new defaulted object.
e.g.: var myScreen = myVendorsService.getNewscreen(null);
Pro-tip: Some defaulted fields require other fields to be populated in order to get the right default value. E.g., CpnyID and CustID are common such fields; so it is recommend that you populate all non-defaulting fields before calling getNewscreen().
e.g.:
var myScreen = new ctDynamicsSL.financial.accountsReceivable.input.invoiceAndMemo.screen();
myScreen.myBatch = new ctDynamicsSL.financial.accountsReceivable.input.invoiceAndMemo.Batch();
myScreen.myBatch.CpnyID = “0060”;
myScreen = myIMObj.getNewscreen(myScreen); //loads defaults that depend on CpnyID
editScreen:
Every web service with a screen() object contains a public screen editScreen(String actionType, screen inScreen) call. This call is the workhouse used for Validations, Adding, Updating, or Deleting data.
The actionType parameter is standardized with: VALIDATEONLY, ADD, UPDATE, or DELETE.
Note: you can leave actionType blank “” and the system will default to ADD if the primary keys do not already exist in the table, or UPDATE if they do. For best practices, always specify ADD or UPDATE.
e.g.:
//validate all my data before attempting to save:
var validateScreen = myVendorsService.editScreen(“VALIDATEONLY”, myScreen);
if (!String.IsNullOrWhiteSpace(validateScreen.errorMessage))
{
MessageBox.Show(“Error: ” + validateScreen.errorMessage);
return;
}
//add our new vendor entry
var add = myVendorsService.editScreen(“ADD”, myScreen);
if (!String.IsNullOrWhiteSpace(add.errorMessage))
{
MessageBox.Show(“Error: ” + add.errorMessage);
return;
}
else
{
//added our vendor, lets get the auto generated VendId
tbVendID.Text = add.myVendor.VendId.Trim();
}