Many companies don’t want to go through the effort of building a customer eCommerce system to sell online. There are many cloud based eCommerce systems that they can use to minimize support, hosting, and development time. Catalina has integrated with many of these such as: Shopify, Magento, BigCommerce, WooCommerce, Square, and others.
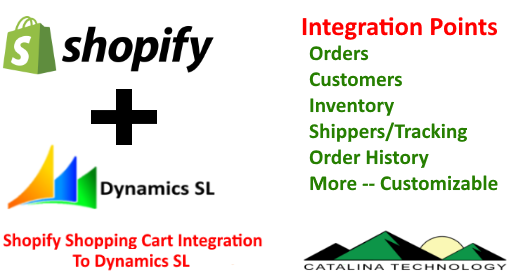
One of the most popular eCommerce systems is Shopify. Catalina’s Dynamics SL integration to Shopify includes:
Order Creation: When an order is created in Shopify, it is automatically transferred to Dynamics SL and created as a Sales order in SL.
Order Acknowledgement: When an order is created in Dynamics SL, Catalina will update Shopify with the SL order number and other information.
Shipper Notification: When an order has shipped (partial or complete), Catalina will send shipper information to Shopify notifying which items have shipped and any tracking numbers that were created.
Order Complete: Once an order is completed, Catalina will notify Shopify that the order is completed so that Shopify can then archive that order.
Inventory updating: Catalina can send inventory information to Shopify which will allow Shopify to know quantity on hand, backorders, out of stock, and other information regarding products for sale on the site. Catalina can also add or remove products from the shopping cart site based on inventory levels and custom rules.
Custom integration points: There are many integration points in Shopify that can be utilized such as synchronizing of customers, logins, invoices, pricing, and more.
At Catalina Technology, we are “Weather Bugs.” Living on Hatteras Island, we get our fair share of weather so we like to keep track of it through various IOT devices and weather stations. Since we collect a lot of data, using a tool like ThingsBoard to retrieve the data and build rules against the data coming in (alarms to tell us to close the windows when it is raining) and dashboards.
This is a demo on how you can connect an Ambient weather station to thingsboard.
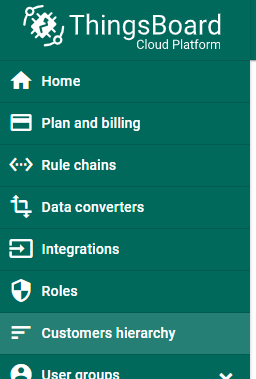
First, you need to make sure you have a customer created. You can go to the customers hierarchy and either make sure you have an existing one or create a new one.
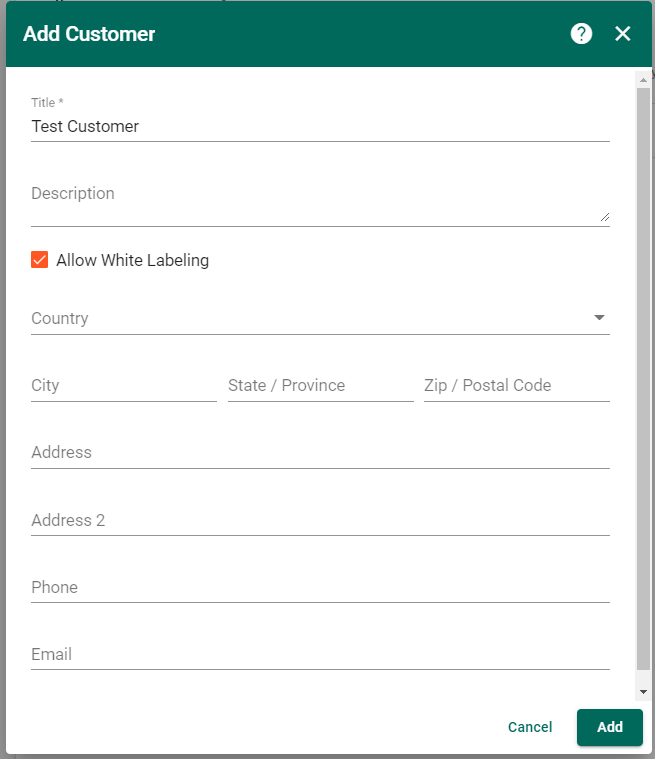
Since I have a fresh ThingsBoard site, I am just going to create a new customer called “Test Customer” and save it.
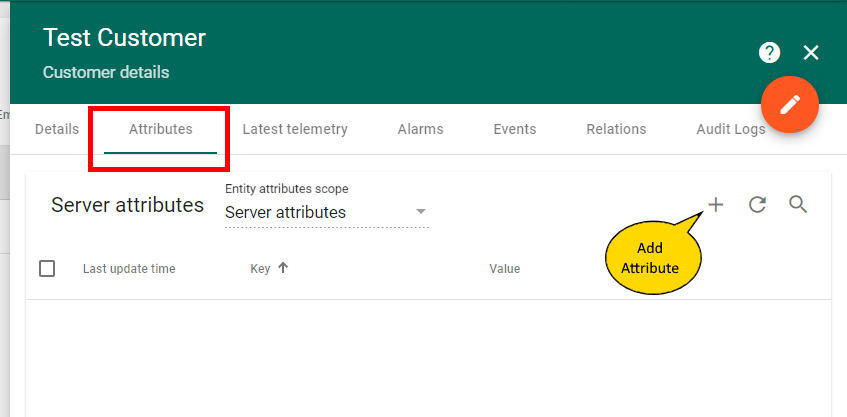
After you have a customer, click on that customer (in the customer hierarchy) and click on the Attributes Tab. What we are going to want to do is store our secret API and Application keys given to us from Ambient.
I am going to create an attribute called AMBIENTAppKey. This will be used later on when we make the API call to Ambient’s RESTful API.
I also did the same for the API key and created an attribute named AMBIENTAPIKey (NOTE: I have blurred out my keys so that someone doesnt gain access to my weather station)
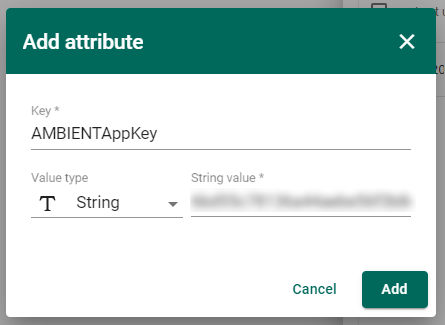
Next, expand your customer and then go into the asset groups and click on All. We are going to add an asset for the weather station.
For lack of a better name, I just named my weather station asset “My Weather Station” and gave it an asset type of WeatherStation.
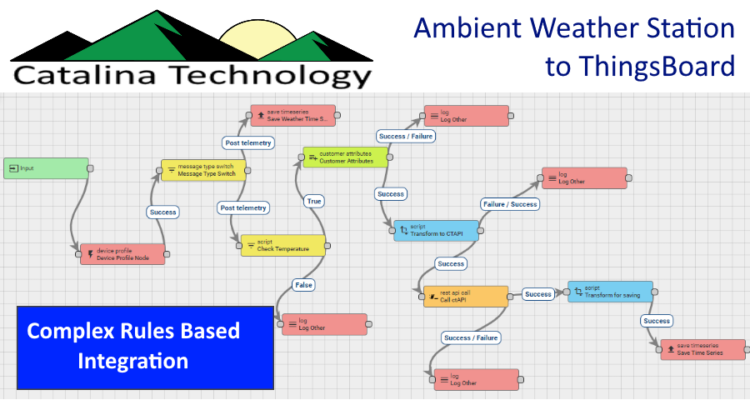
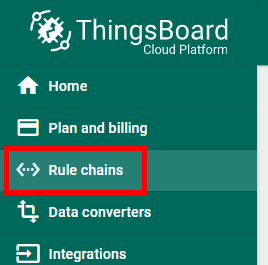
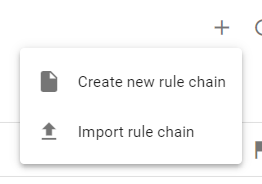
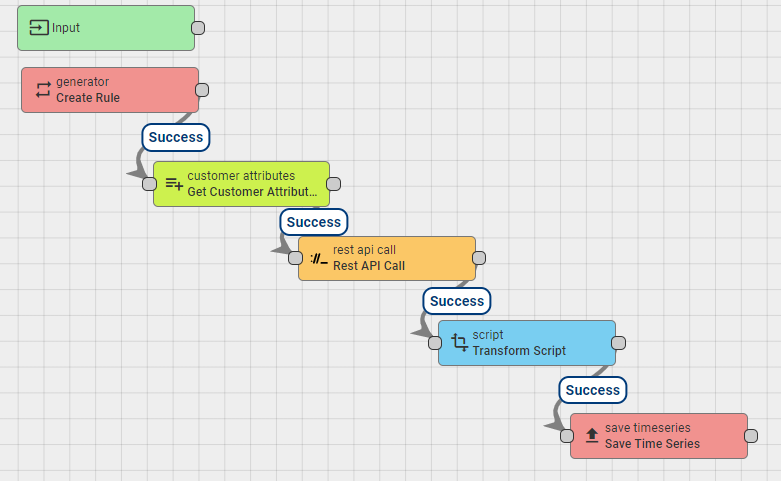
Now we are going to write the actual rules. Go to “Rule Chains”
We are going to create a new rule chain.
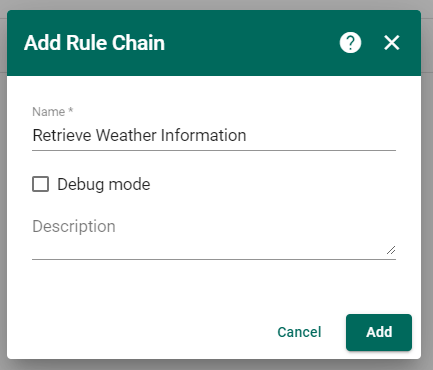
Since this rule chain is going to be retrieving data from Ambient’s RESTful API and then tying it to the asset we created, I am just going to name this “Retrieve Weather Information”
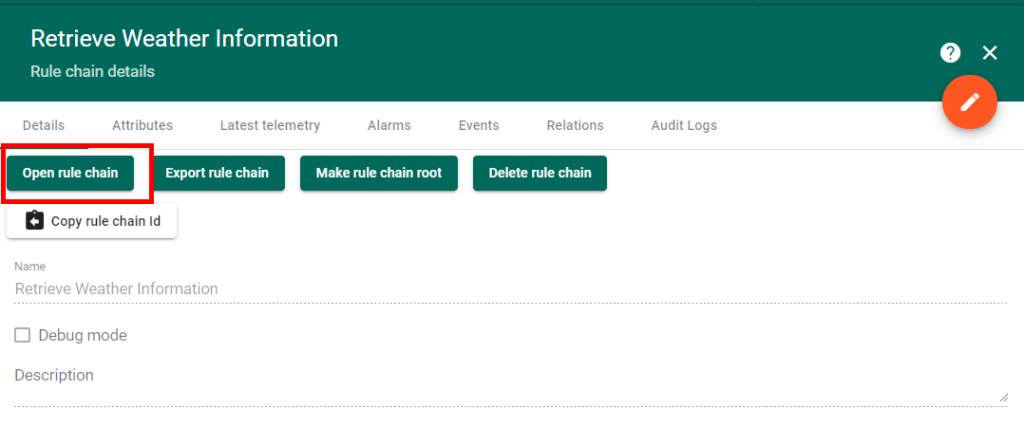
Once the rule is created, click on it and then click on the “Open rule chain” button.
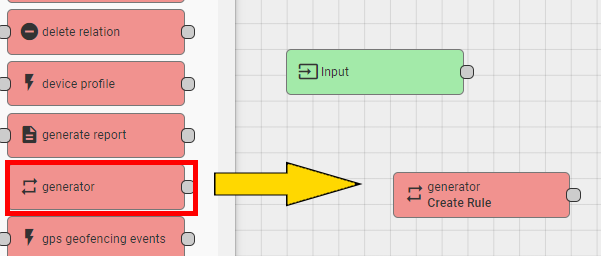
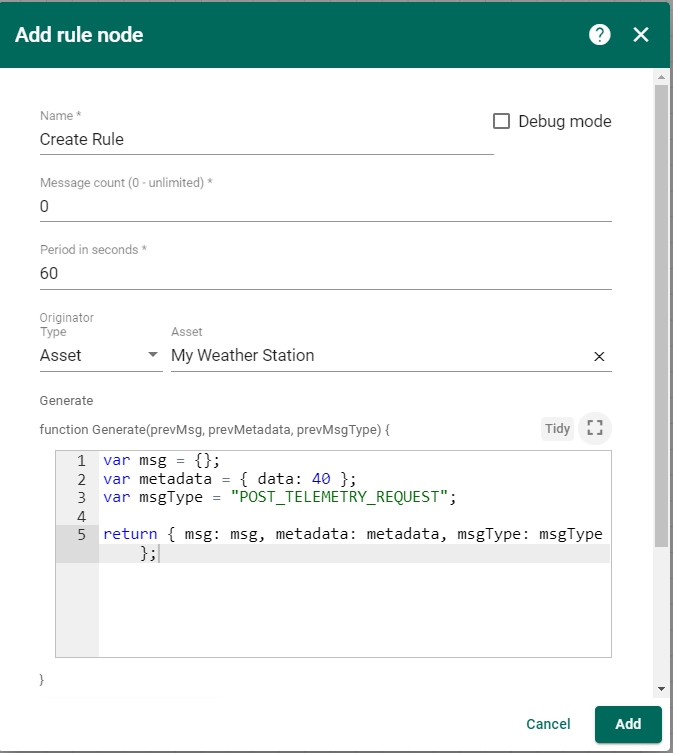
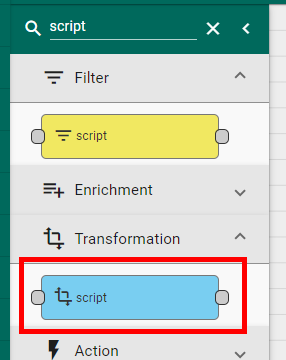
Now we are going to use the “Generator” rule node. Just simply drag it out to the work surface.
What a generator rule node does is allow us to create a timer event against a particular asset or other entity in the system. In our case, we are going to just point to the Asset “My Weather Station”. And we are going to change the guts of the code to just use an empty msg.
Here is the code so that you can cut and paste
var msg = {};
var metadata = { data: 40 };
var msgType = "POST_TELEMETRY_REQUEST";

return { msg: msg, metadata: metadata, msgType: msgType };
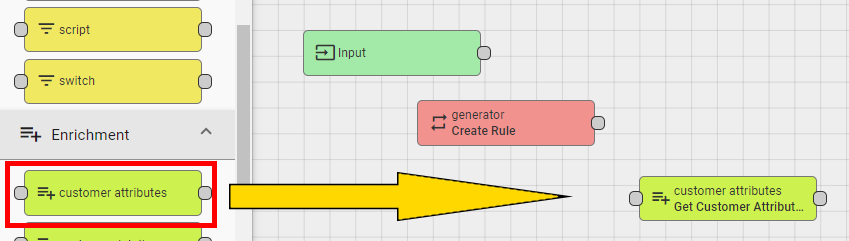
Next, we want to get access to the customer attributes (AMBIENTAPIKey and AMBIENTAppKey) so that we can use them. Just drag the customer attributes out
A popup will be shown. Enter the below. What we are doing is taking the source attribute (tied to the customer) and then making it a variable that we can use. You could change the name of the attribute if you want. But it is just easier to keep it the same. So, make the Target attribute names the same as the Source attribute names.
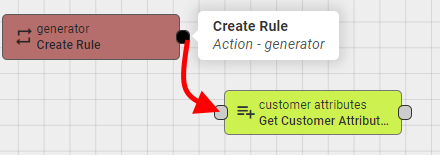
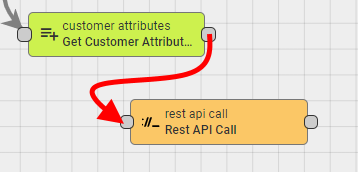
Once you save the above, you will then want to link the generator node to the customer attributes. Just grab the little circle on the right of the generateor node and drag it to the left of the customer attributes node.
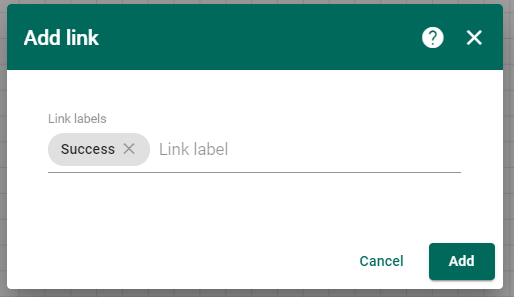
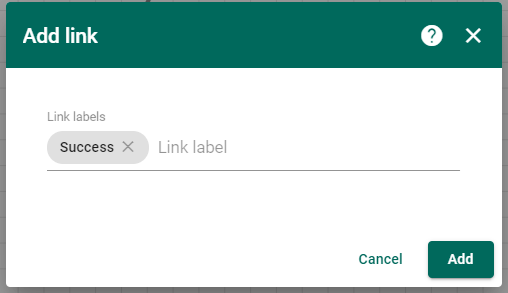
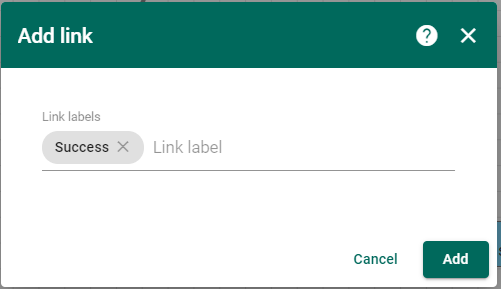
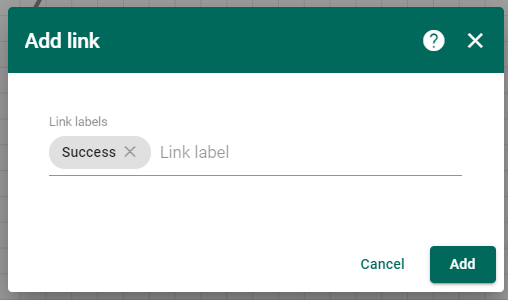
It will ask you what the link should be. We want to go to the next step if there is a success.
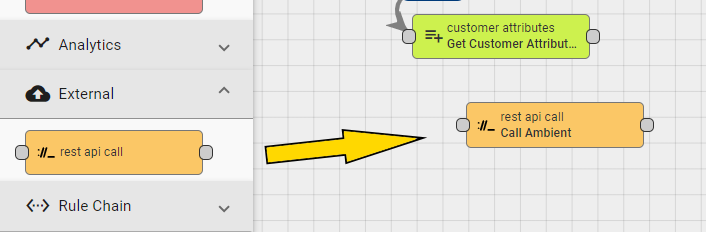
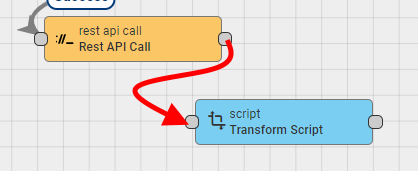
Next, drag out the rest api call node to the work surface so that we can then call Ambient’s API.
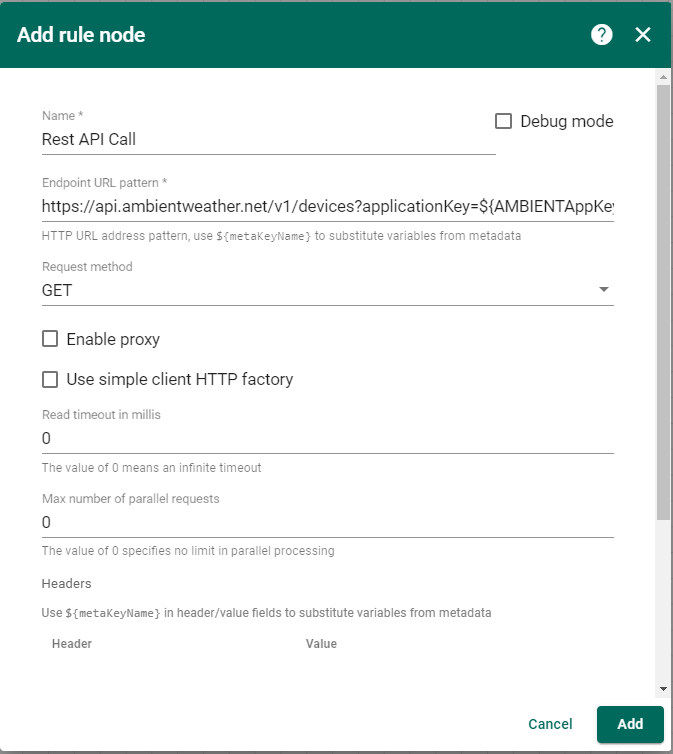
A popup will be shown. I just named this “Rest API Call” and then entered the endpoint for the Ambient API. NOTE: you will see how I replaced the actual key with a customer attribute. Also NOTE that this is a “GET” Request method.
Below is what the URL looks like with the attribute key variables embedded. What the Rest API Call node will do when it executes is replace those variables with the values stored under the customer’s attributes with the same name.
And link the Rest API Call node to the transformation script.
Making sure that we do this on success. What this will then do is take the output of the API call and pass it to the script for transformation.
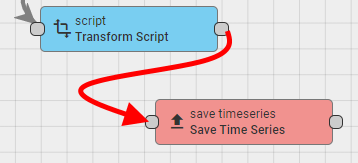
Now, we just want to simply save the transformed data. It will be saved against the asset we are working on.
And link the transformation script to the time series node for success.
This is what the whole rule chain looks like.
Now we want to show this on a dashboard.
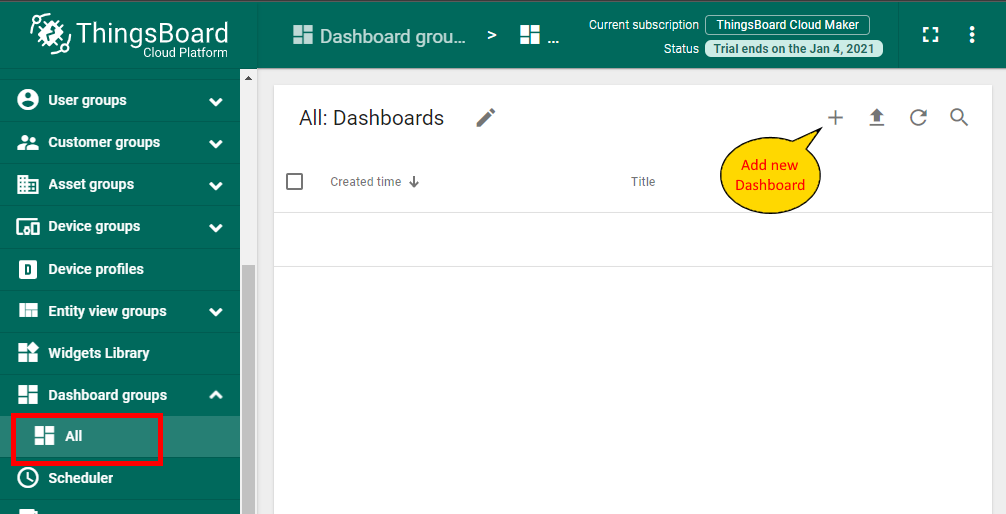
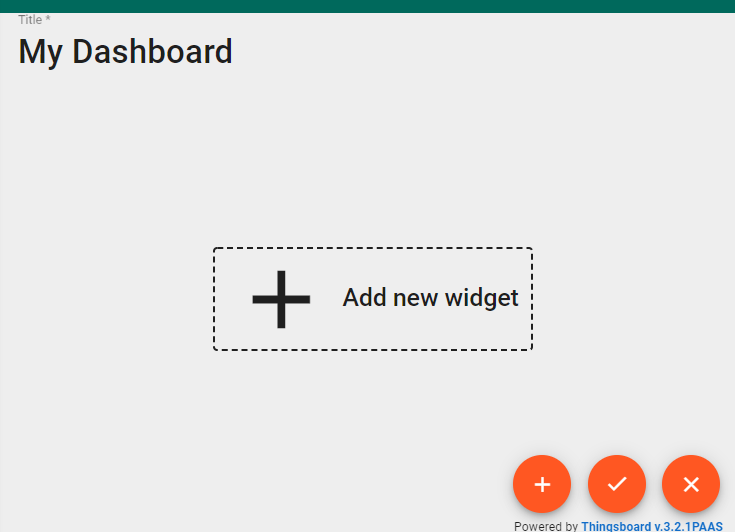
Create a new Dashboard. I am just naming it “My Dashboard”
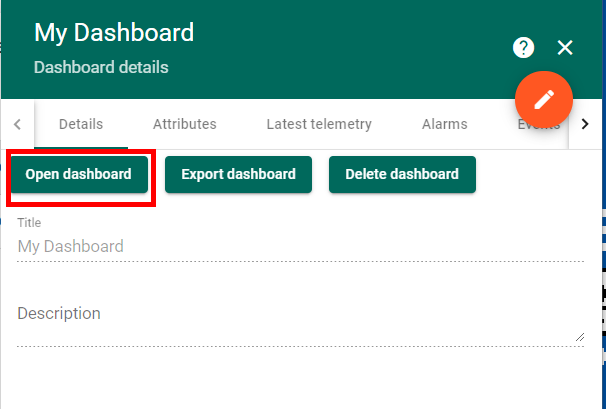
Once the dashboard is created, open it.
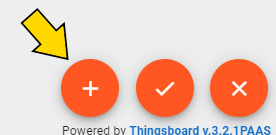
Lets add a widget.
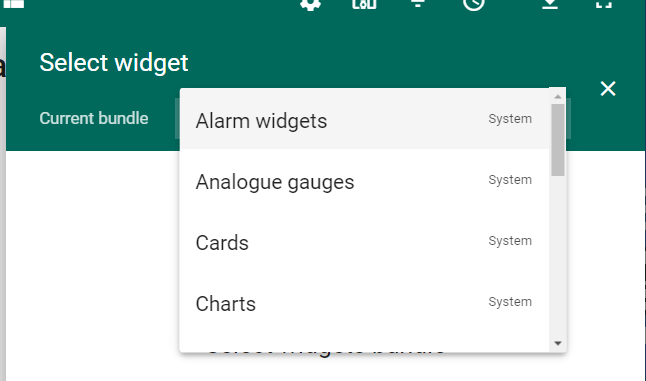
Choose the Cards widget bundle.
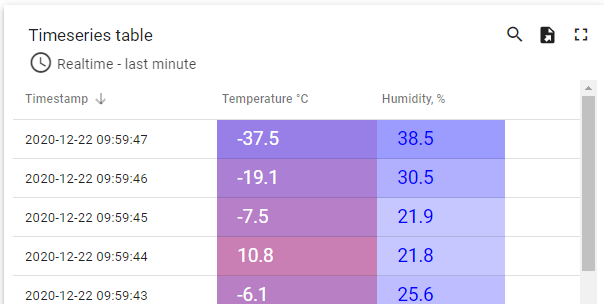
I am going to use the timeseries table.
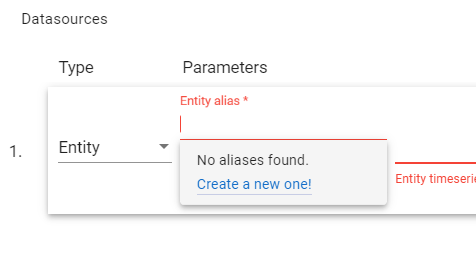
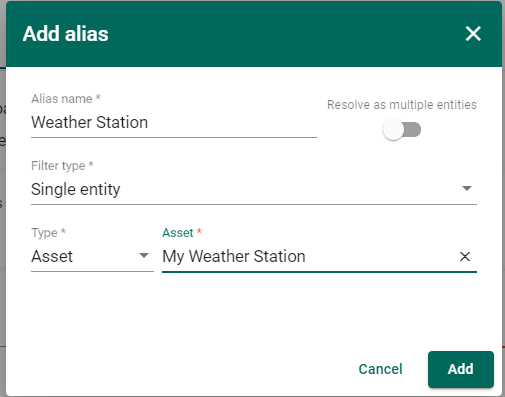
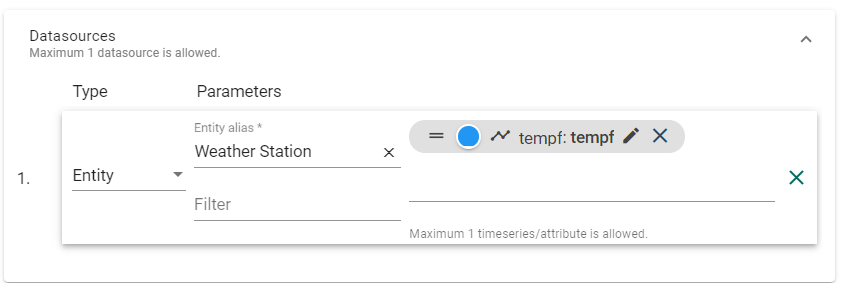
You need to link the widget to data. So, what we are going to do is create a new alias to data since we dont have one already.
We are going to give it an alias name. This is just a name we can now use in this dashboard to refer to data. I am going to use a “single entity” type of filter. And I am going to point it to my Weather Station asset.
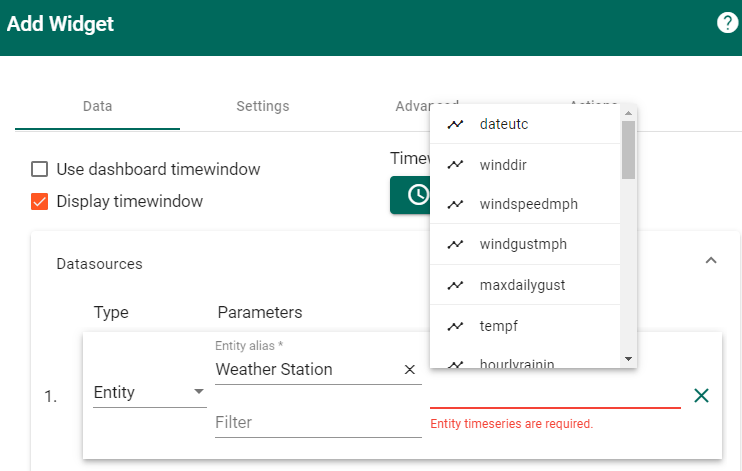
After you have pressed add to save the alias, you can then use that alias in your datasource. I am going to point to the Entity alias for “Weather Station” and then choose which data variables I want to show on my table.
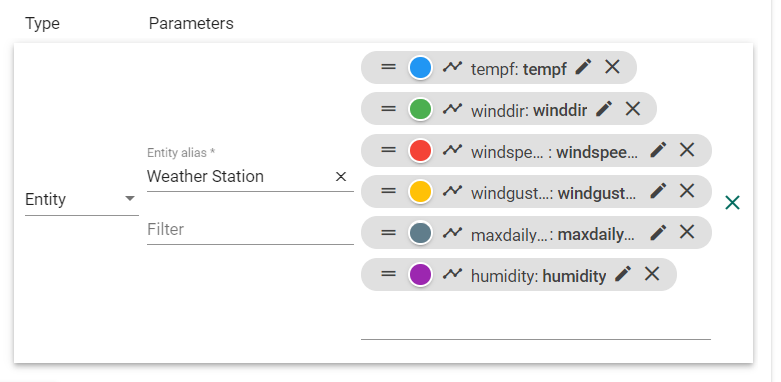
I choose several variables for temperature, wind direction and speed, etc. You can drag the variables around to change the order in the table. You can also click on the pencil to edit things like header, color, etc.
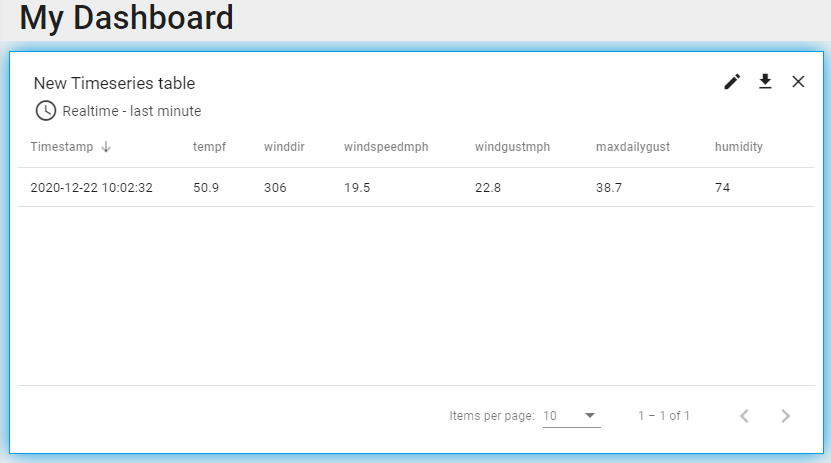
After I save that, I can then see the data showing up in my timeseries table on my dashboard.
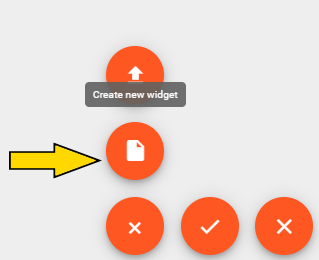
I want to do another one a bit more graphical. So, hit the plus button to add another widget.
Lets create the new widget.
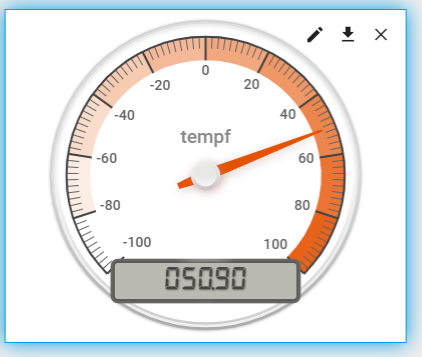
What I did then was choose Analog gauge and choose the temperature gauge and then pointed the tempf field (temperature F) to be displayed.
And now I have a nice gauge. You can add as many things as you want. As well as bring in other data from other devices and assets. We also use water temperature from an ESP32 device out off of our dock to create a fully comprehensive view of weather and conditions without just getting data from one weather station.
There are many times where someone out in the field doesn’t have access to a field service app. Or doesn’t need one. SMS is one of the easiest ways for relaying information.
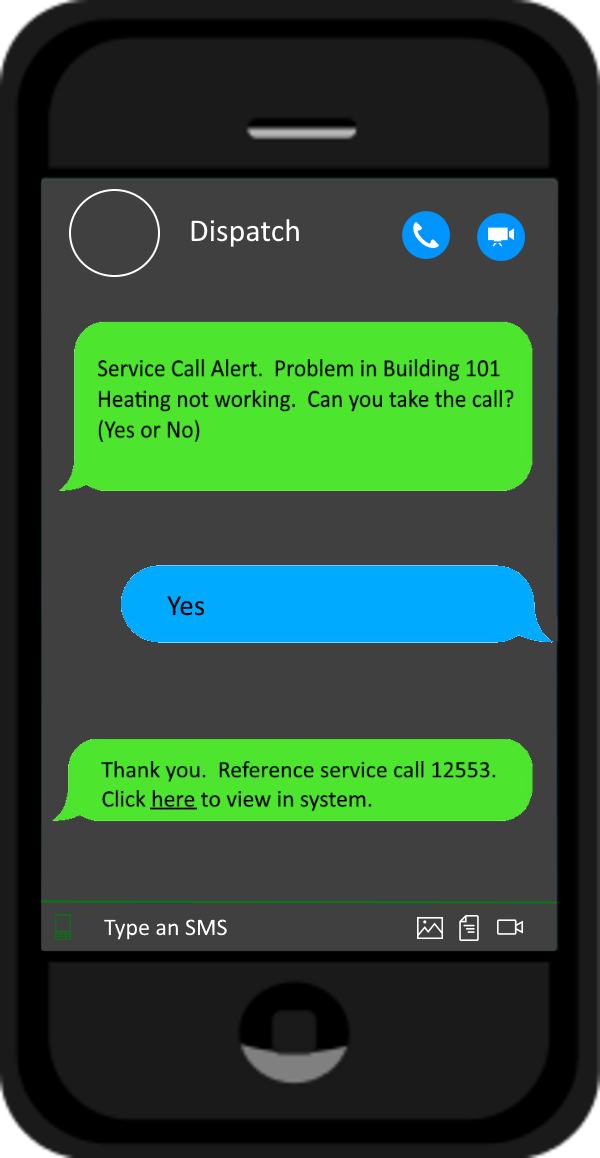
Catalina Technology’s SMS Central now automates communication between systems like help desks, dispatch, CRM, service, and others by giving two-way communication between the technician or sales guy, in the field, and your back-office system.
This means that you can send dispatch SMS notifications and the person receiving those SMS messages can then respond to them by simply replying to the text message. SMS Central will update the back-office system based on the mobile user’s SMS reply. All without any special app.
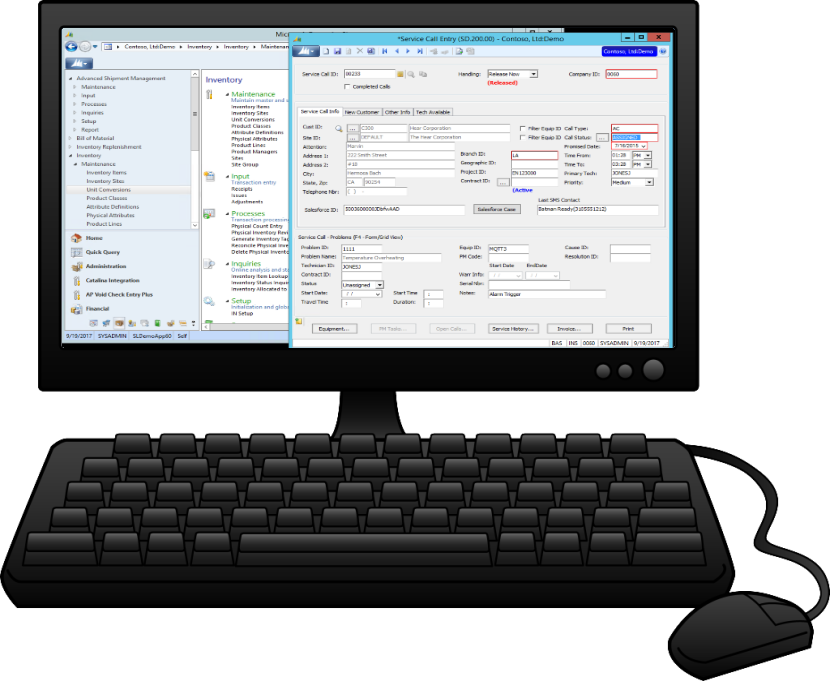
1. Create a service call in your dispatch or other system
Create a service call, sales opportunity, customer service case, etc. in your back-office system system like you always do.
Assign it to one or more people.
SMS Central will automatically pick this up, from your system, and send as an SMS Text Message to the assigned people.
2. SMS Central then automatically sends an SMS message, from your back-office system, to the assigned person
Send to any phone with SMS (even including old flip phones).
Can be done hands free with Siri, Cortana, or Google Assistant to do voice response of texts!
Customize the messages that are sent out.
Your field personnel can actually respond to the SMS message with customizable acceptable responses like “Yes”, “No”, “In route”, “can’t make it”, or any other response you want.
If the person doesn’t respond to the message, SMS central has routing and escalation capability to send to others.
Responses can even include pictures, files, video, GPS coordinates, or other attachments. SMS Central will save this for you.
3. SMS Replies are automatically routed back to your system!
Your system is automatically updated based on the response that was sent back.
Any additional replies to this SMS text thread will be logged as notes or history in your system.
Attachments such as pictures, files, video, voice, and GPS coordinates will be stored and tied to the service call.
Many of us still have customers, vendors, employees, etc. who require printed invoices, checks, letters, or other documents to be mailed to them. This is a hassle to do. Extracting and formatting the data, mail-merging, printing, folding, stuffing envelopes, postage, and mailing takes time and costs money.
Catalina Technologies’ Cloud based printing and mailing solution automates this process and merges data from your ERP, CRM, helpdesk, or other system and prints and mails these documents for you.
How does this work? We merge your data into a customizable template, print it, and mail it. All on the Cloud! It is just that simple!
(NOTE: You can jump to the end of this post to see a demo of this in action!)
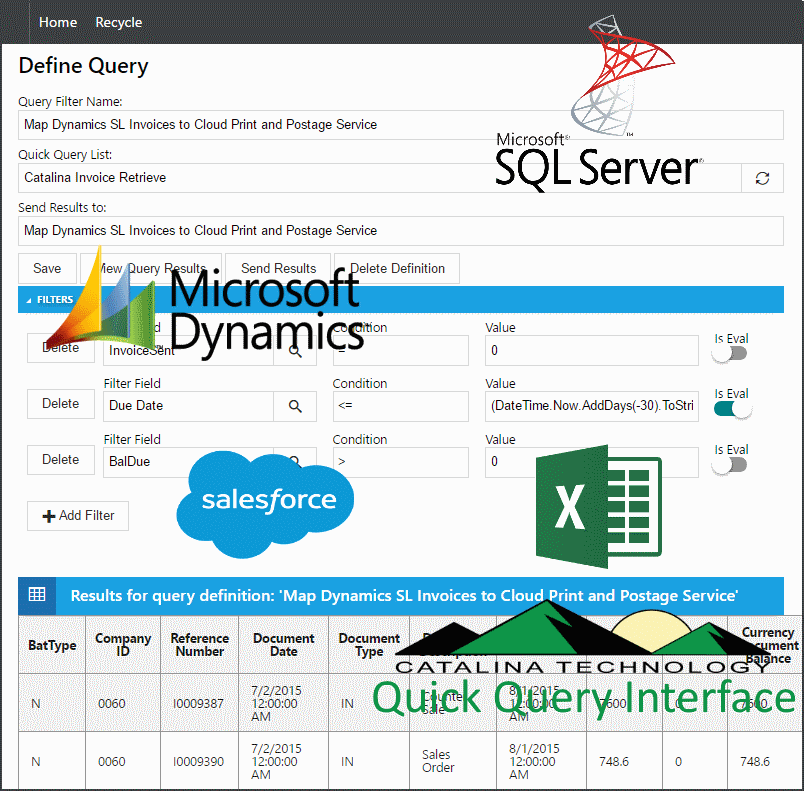
Data Integration
To make life easier, you want your ERP, helpdesk, CRM, or other system to automatically feed the cloud printing and postage so that you don’t have to do manual steps to get your data out of your back office, merged, printed, and mailed. Catalina Technology has a full set of integration tools that allows you to integrate from most ERP’s, CRM systems, Helpdesk, or SQL Query, Excel spreadsheet, CSV, etc. Catalina also has a front-end to Quick Query that allows you to define Quick Query filter definitions that can have custom mapping rules. These Quick Query filter definitions can then be saved and scheduled as automated jobs.
Dynamics SL, GP, and CRM
Salesforce.com
Any SQL Query
Excel spreadsheets
.CSV files
You can call our API from your system
Custom integration
Templating
Templating is an important part of a printing solution. This allows you to be able to customize how data is merged into the output document to any format you want.
These can then be printed as:
Invoices
Letters
Postcards
Holiday cards
Checks
Anything you would normally send to a customer, vendor, employee, business associate, etc!
Demo
Here is a quick demo we did on one of our recent webinars showing how we can receive data from Dynamics SL, merge it into invoices, and then send it out to be printed and mailed to your customers.
[youtube https://www.youtube.com/watch?v=kJGuq5id7pM]