It is easy to retrieve most any data from SL using Catalina’s API for Quick Query. Below is an example of how you can use SOAP and .NET to do this. This example shows yow you can retrieve subaccounts
First, you can also call the QuickQuery API via Postman (using the RESTful API) via below (NOTE: this should bring back all sub accounts since we arent filtering for anything.
Below is .NET code using SOAP. I had registered the SOAP web service quickQuery.ASMX and named it ctAPI.QuickQuery. This code shows you how you can retrieve subaccounts in 2 different ways
The first one just brings back all sub accounts
The second call brings back just sub accounts that contain the word “admin” in the Description
public void RunIt()
{
       // call the web service, requesting the “QQ_SubAccount” quick query to be run. We will pass an empty filter array so that it will get everything
       var returnWithoutFiltering = QuickQueryService.getScreen("QQ_SubAccount", new ctAPI.QuickQuery.queryFilter[0]);
       {
              // I like to convert to a JArray so that I can do other things with it.  but lets loop through each row
              Newtonsoft.Json.Linq.JArray myArry = Newtonsoft.Json.Linq.JArray.FromObject(returnWithoutFiltering.myQueryResults.Tables[0]);
              foreach (var myVal in myArry)
              {
                     Console.WriteLine($"SubAcct: {myVal["Subaccount"].ToString().Trim()}, Descr: {myVal["Description"].ToString().Trim()}");
              }
       }
       Console.WriteLine();
       // lets filter all sub accounts that contain the word "admin" in the description
       var myFilters = new List<ctAPI.QuickQuery.queryFilter>
       {
              new ctAPI.QuickQuery.queryFilter {name = "Description", comparisonType = "LIKE", value="%admin%" }
       };
       // call the web service, requesting the “QQ_SubAccount” quick query to be run. Passing the myFilters array for filtering
       var returnWithFiltering = QuickQueryService.getScreen("QQ_SubAccount", myFilters.ToArray());
       {
              // I like to convert to a JArray so that I can do other things with it.  but lets loop through each row
              Newtonsoft.Json.Linq.JArray myArry = Newtonsoft.Json.Linq.JArray.FromObject(returnWithFiltering.myQueryResults.Tables[0]);
              foreach (var myVal in myArry)
              {
                     Console.WriteLine($"SubAcct: {myVal["Subaccount"].ToString().Trim()}, Descr: {myVal["Description"].ToString().Trim()}");
              }
       }
}


private ctAPI.QuickQuery.quickQuery _quickQueryService = null;
public ctAPI.QuickQuery.quickQuery QuickQueryService
{
       get
       {
              if (this._quickQueryService == null)
              {
                     this._quickQueryService = new ctAPI.QuickQuery.quickQuery
                     {
                           Timeout = 300000,
                           ctDynamicsSLHeaderValue = new ctAPI.QuickQuery.ctDynamicsSLHeader
                           {
                                  siteID = "YOURSITEID",
                                  cpnyID = "YOURCPNYID",
                                  licenseKey = "YOURLICENSEKEY",
                                  licenseName = "YOUR LICENSE NAME",
                                  licenseExpiration = "1/1/1900",
                                  siteKey = "YOURSITEKEY",
                                  softwareName = "CTAPI"
                           }
                     };
              }
              return this._quickQueryService;
       }
       set
       {
              this._quickQueryService = value;
       }
}
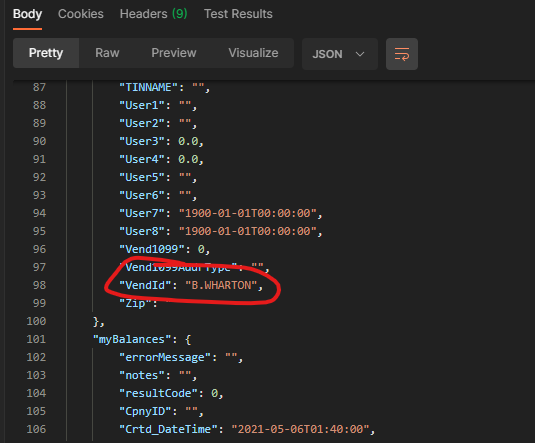
Below here is the data structure of a subaccount from the Quick Query QQ_SubAccount
If you are connecting to one of Catalina’s API endpoints (either REST or SOAP) and you are using https://, if you get an error saying the “Connection was Forcibly Closed,” this is normally because the web server requires a specific TLS version and your client isn’t using that.
If you are writing this in .NET, this can be easily overcome by adding this statement before you make a call to our API (it is normally fine to put it in the constructor or in some startup routine):
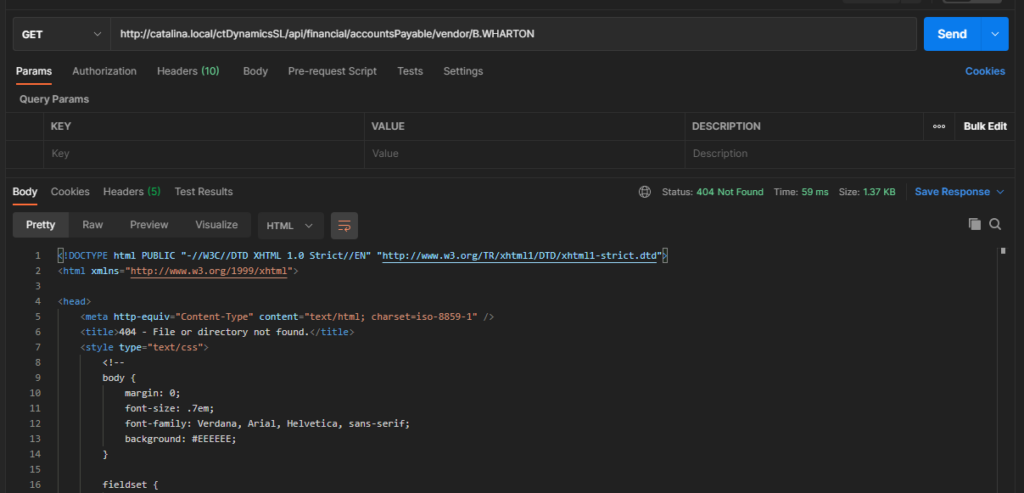
What happens if you are using Catalina’s API for Dynamics SL and your ID you are searching for (example a CustID, Vendor ID, etc) has a period in it? It will fail with standard installation. This is because the .NET web application is looking for a period in the final parameter so that it can route.
You will get a return that looks something like this with a 404 status and HTML coming back:
This can be solved by changing the web.config.
NOTE: if you make this change, then you wont be able to run SOAP and REST in the same application. SOAP will stop working and you would need to install a separate instance with it’s won web.config to make this work.
If you look in the Web.config, you will see the following line:
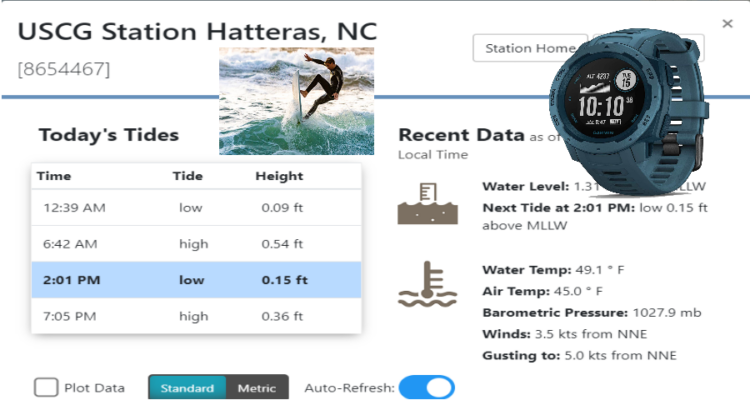
We aren’t just business here on the blog. We often work on other projects for fun and to keep our programming skills tight. This one is to help us predict the best time to go surfing.
If anybody has the standard Garmin Instinct watch and wants Tide information on their watch is out of luck since Garmin wants you to spend twice as much to buy the fancy expensive Surf edition watch.
There is kinda a workaround by importing data into a Google Calendar with data from NOAA that will schedule events for the predicted tides. So, I decided to write a .NET Core app that goes out to NOAA and pulls back tide predictions, for a station ID that you specify, and a date range to get the predictions. It will then write that information to a CSV file that you can upload to a google map and then sync to your watch.
The .NET Core app will run on most any machine that has .NET Core installed (Windows, Mac, Linux). It will allow you to pass parameters for beginDate, endDate, station ID (from NOAA) and a filename to output the CSV to. What I did is just run it from 1/1/2021 through 12/31/2021 so that I can populate data for the entire year.
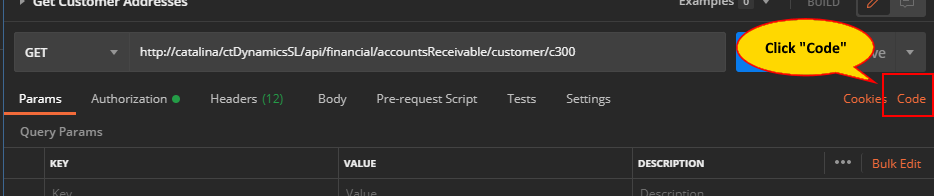
There are times that you might have questions or problems when developing using an API. You contact support and they will ask you to send you the “payload” you are using when communicating with the Catalina API for Dynamics SL. The easiest way to do this, if you are using Postman as your testing environment, is to export the code. This is done in these simple steps
Step 1: Got to your postman tab you are making the API call from and click on the “Code” link on the right of the screen
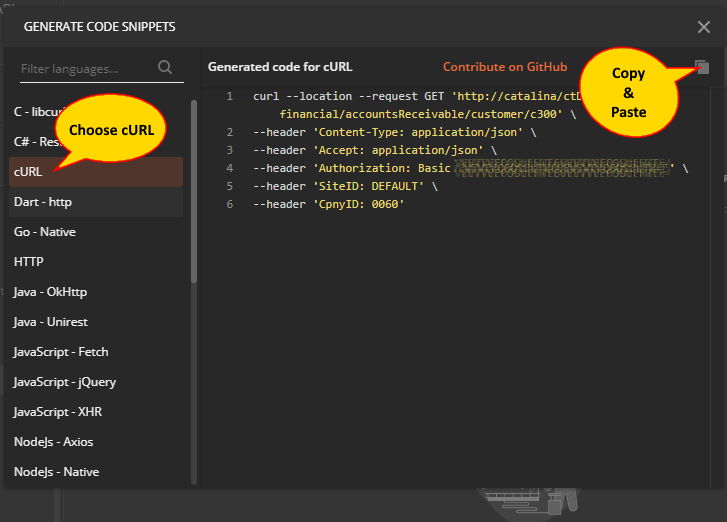
Step 2: On the popup, click on cURL and then copy the text provided, paste it into an email, and send to Support.
It is simple to call a stored procedure through a RESTful API call if you have Catalina’s API for Dynamics SL. You can call any stored procedure and pass parameters and retrieve data.
This is a demo on how to call a stored procedure using Postman and Catalina’s API for Dynamics SL.
First, to do this demo, you need to download and install Postman. Postman is a developer tool that allows you to interact with API’s easily so that you can test API calls to see how you call them and what data is returned. You can get Postman here: https://www.postman.com/
In the demo, we are going to call the stored procedure SOHeader_all. This stored procedure retrieves all Sales Order Headers (SOHeader) for a particular CpnyID and OrdNbr. NOTE: this is just an example. With Catalina’s API, you can call any stored procedure.
SOHeader_all has 2 parameters: – @parm1: This parameter is for the CpnyID – @parm2: This parameter is for the OrdNbr (can use a wildcard like ‘O000%’ which will bring back all orders that start with O000.
You can see what the procedure looks like here:
PROCEDURE [dbo].[SOHeader_all]
	@parm1 varchar( 10 ),
	@parm2 varchar( 15 )
AS
	SELECT *
	FROM SOHeader
	WHERE CpnyID = @parm1
	   AND OrdNbr LIKE @parm2
	ORDER BY CpnyID,
	   OrdNbr DESC
So, if you wanted to retrieve all orders that started with “O000” for CpnyID = “0060” you would call the stored procedure like this:
exec SOHeader_all @parm1='0060', @parm2='O000%'
So, now how to call this using Postman through Catalina’s API for SL?
First you need to know where your Catalina API is installed. I am going to use the server name yourserver.com as the domain name. So, for this example, we would look at the endpoint as the following:
As you can see above, you would replace yourServer.com with wherever your server is. And you can see <ProcedureName> in the URL. this would be replaced with the actual stored procedure name you want to call (in this example, we are going to replace it with SOHeader_all). So, the new URL for the endpoint would look like the following:
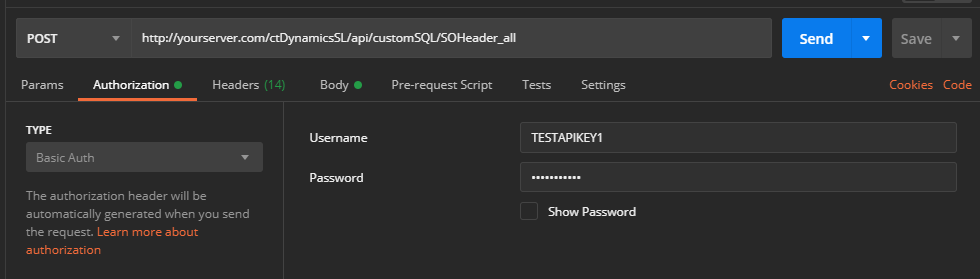
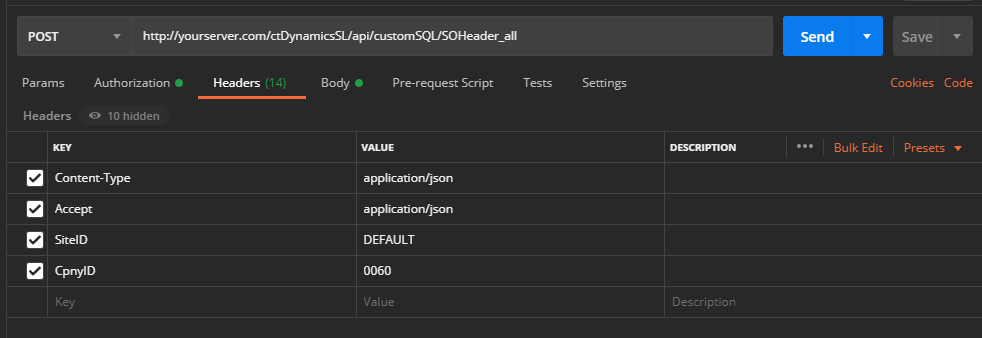
In Postman, you would make it look like below. NOTE: when calling a customSQL stored procedure, you must use the action type of “POST”
Next, you need to set the authentication. This is done on the “Authorization” tab. Catalina’s API uses “Basic Auth”. So, make sure that you set the type for “Basic Auth” in the dropdown. And then enter the username and password that was given to you from your installer.
After that, you will have been given a SiteID from your installer. You will need to create a Header for that SiteID. You do this on the headers tab. You should enter that SiteID (in my example it is “DEFAULT”, but you would use the SiteID given to you by your installer) and the default CpnyID (in my example that is “0060”, but you would use your CpnyID of your database)
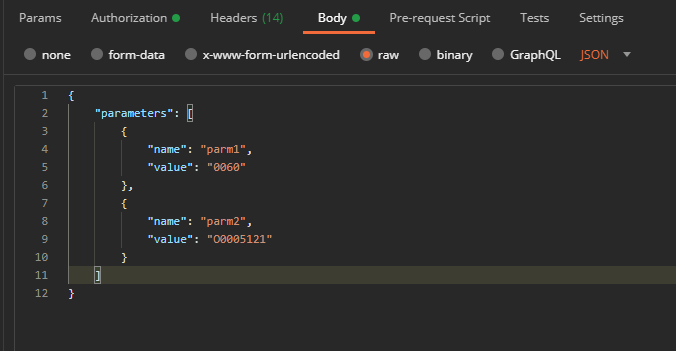
Finally, you will want to enter the body of the parameters that are being passed. There are 2 parameters for SOHeader_all (@parm1 and @parm2). The format of the body that you would set is below.
So, your Body tab in Postman would look like this (NOTE: make sure you select the “raw” radio button as shown below)
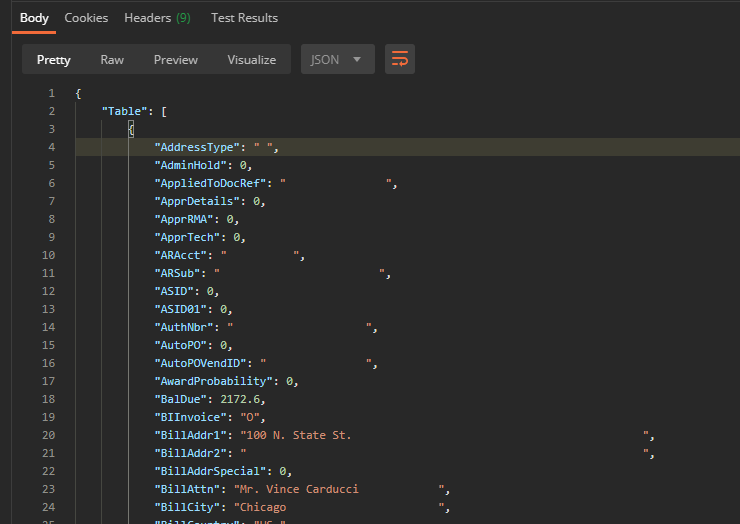
Then all you have to do is simply hit the “Send” button and the system should retrieve the results from your stored procedure call. In my example, it looks like below
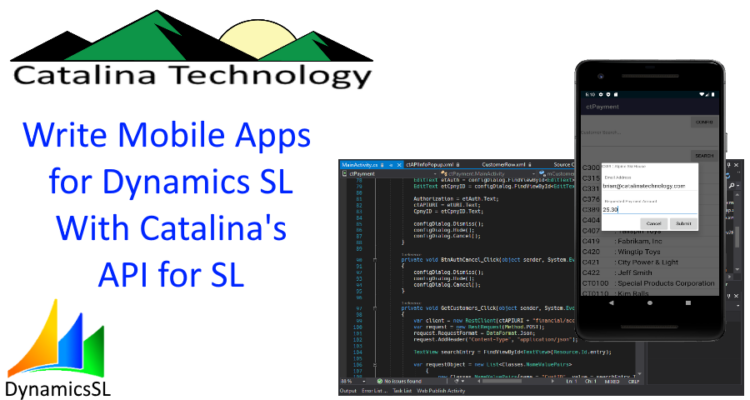
This is a demo that shows you how to create a mobile app to interact with Dynamics SL to provide a “Contact Free” payment solution to help protect your employees and customers during COVID 19. The intended user of this example app would be a customer service rep, sales person, or field service rep who needs to collect payment from a customer (handy for collecting a deposit or down payment before delivery, installation, or service work to be done).
This demo uses Catalina’s API to search customers in SL and then lets the user to request a payment from a customer by generating a link and emailing it to the chosen customer. That customer then can click on the link and pay the amount which automatically creates a payment in SL’s AR.
Check out the video of the demo on our Youtube channel here:
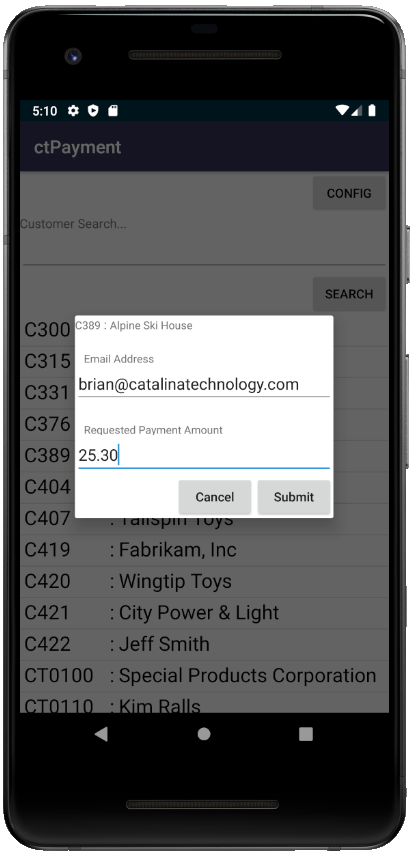
Below is a screenshot of the Android app from the above demo. First you can search for a customer by a keyword. That search will then bring back a list of results. You can then click on the customer you want to request funds for. The app will automatically fill in the email address of the customer (from the Customer record in Dynamics SL). You can change the email address if you want. You then enter a requested payment amount and hit submit. Once you do this, Catalina’s SLQuickCollect will send off an email to the customer with a link which will then allow them to make a PCI compliant secure payment. Once authorization occurs, SLQuickCollect will then create a payment in Dynamics SL automatically.
As mentioned below, if you want to have starter code on creating an Android App (with Visual Studio and Xamarin), you can check out an example on our Github here (NOTE: I would only consider this a starter. This is in no means something finished but enough to get you started)