It is easy to retrieve most any data from SL using Catalina’s API for Quick Query. Below is an example of how you can use SOAP and .NET to do this. This example shows yow you can retrieve subaccounts
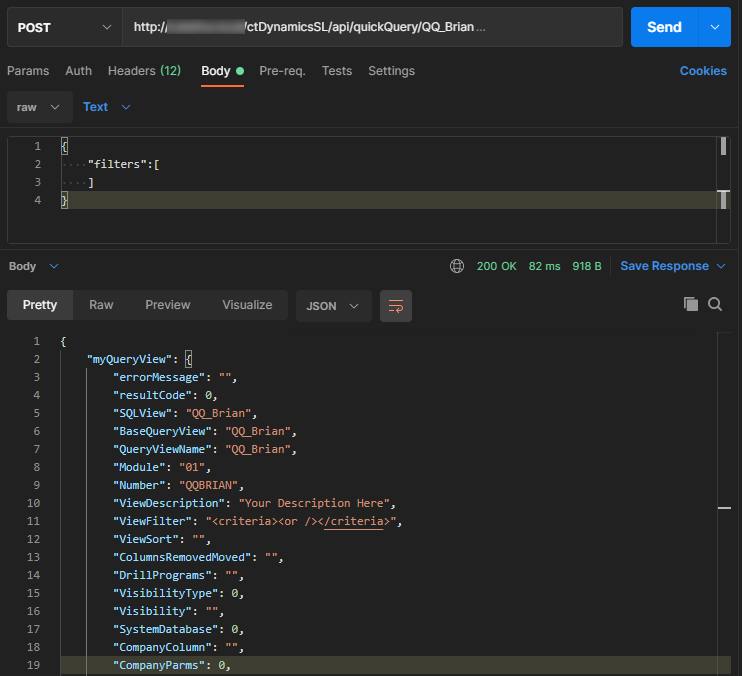
First, you can also call the QuickQuery API via Postman (using the RESTful API) via below (NOTE: this should bring back all sub accounts since we arent filtering for anything.
Below is .NET code using SOAP. I had registered the SOAP web service quickQuery.ASMX and named it ctAPI.QuickQuery. This code shows you how you can retrieve subaccounts in 2 different ways
The first one just brings back all sub accounts
The second call brings back just sub accounts that contain the word “admin” in the Description
public void RunIt()
{
       // call the web service, requesting the “QQ_SubAccount” quick query to be run. We will pass an empty filter array so that it will get everything
       var returnWithoutFiltering = QuickQueryService.getScreen("QQ_SubAccount", new ctAPI.QuickQuery.queryFilter[0]);
       {
              // I like to convert to a JArray so that I can do other things with it.  but lets loop through each row
              Newtonsoft.Json.Linq.JArray myArry = Newtonsoft.Json.Linq.JArray.FromObject(returnWithoutFiltering.myQueryResults.Tables[0]);
              foreach (var myVal in myArry)
              {
                     Console.WriteLine($"SubAcct: {myVal["Subaccount"].ToString().Trim()}, Descr: {myVal["Description"].ToString().Trim()}");
              }
       }
       Console.WriteLine();
       // lets filter all sub accounts that contain the word "admin" in the description
       var myFilters = new List<ctAPI.QuickQuery.queryFilter>
       {
              new ctAPI.QuickQuery.queryFilter {name = "Description", comparisonType = "LIKE", value="%admin%" }
       };
       // call the web service, requesting the “QQ_SubAccount” quick query to be run. Passing the myFilters array for filtering
       var returnWithFiltering = QuickQueryService.getScreen("QQ_SubAccount", myFilters.ToArray());
       {
              // I like to convert to a JArray so that I can do other things with it.  but lets loop through each row
              Newtonsoft.Json.Linq.JArray myArry = Newtonsoft.Json.Linq.JArray.FromObject(returnWithFiltering.myQueryResults.Tables[0]);
              foreach (var myVal in myArry)
              {
                     Console.WriteLine($"SubAcct: {myVal["Subaccount"].ToString().Trim()}, Descr: {myVal["Description"].ToString().Trim()}");
              }
       }
}


private ctAPI.QuickQuery.quickQuery _quickQueryService = null;
public ctAPI.QuickQuery.quickQuery QuickQueryService
{
       get
       {
              if (this._quickQueryService == null)
              {
                     this._quickQueryService = new ctAPI.QuickQuery.quickQuery
                     {
                           Timeout = 300000,
                           ctDynamicsSLHeaderValue = new ctAPI.QuickQuery.ctDynamicsSLHeader
                           {
                                  siteID = "YOURSITEID",
                                  cpnyID = "YOURCPNYID",
                                  licenseKey = "YOURLICENSEKEY",
                                  licenseName = "YOUR LICENSE NAME",
                                  licenseExpiration = "1/1/1900",
                                  siteKey = "YOURSITEKEY",
                                  softwareName = "CTAPI"
                           }
                     };
              }
              return this._quickQueryService;
       }
       set
       {
              this._quickQueryService = value;
       }
}
Below here is the data structure of a subaccount from the Quick Query QQ_SubAccount
Ok, so using Catalina’s API for Dynamics SL makes it easy to get data out of SL through it’s quick query endpoint (/ctDynamicsSL/api/quickQuery). But what if you really don’t actually use QuickQuery in SL. But you still want to use it in Catalina’s API? Easy, just create your view and then add a reference to it in QVCatalog table in your System Database.
Step 1: Creating the View
What I first am going to do is create a view in my Application Database. This will be a simple view that will retrieve customers. And only retrieve the CustID and Customer Name. Below is the SQL code to create my view named QQ_Brian.
/****** Object:  View [dbo].[QQ_Brian]  ******/
SET ANSI_NULLS ON
GO
SET QUOTED_IDENTIFIER OFF
GO
CREATE VIEW [dbo].[QQ_Brian]
AS
SELECT
     CustId AS [Customer ID],  Name AS [Customer Name]
FROM	Customer with (nolock)

GO
Step 2: Create a Reference to the View in QVCatalog
Next step is to insert a record into the QVCatalog table to reference the view. This table will be in your System Database. Below is what my insert looked like
Looking at the above insert statement, you see where I am using the name of my view (QQ_Brian) for SQLView, BaseQueryView, and QueryViewName. I am also using QQBRIAN as my number. You would change these values to what your view name is. I also entered a description (“Your Description Here”). Set that value to something that will allow you to remember what this view does.
Testing it!!!
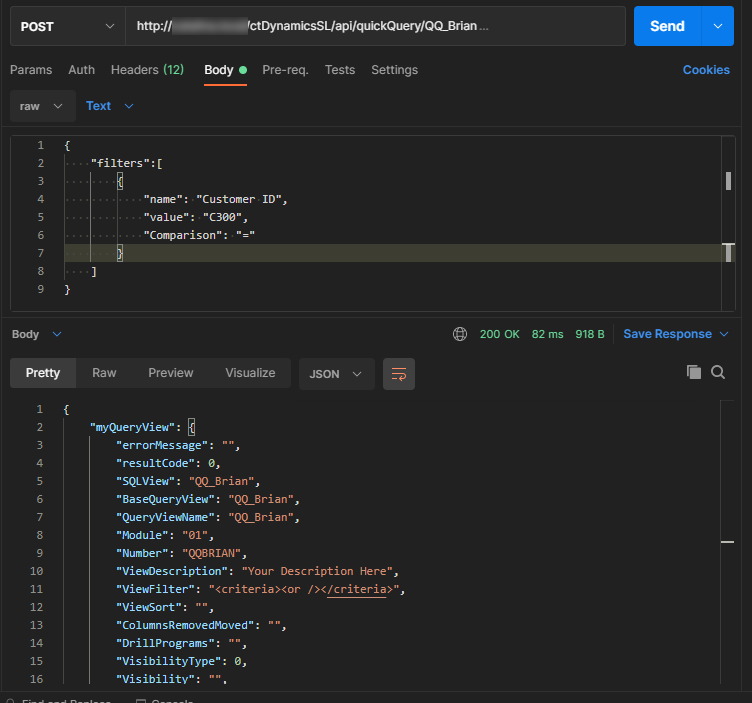
Now all you have to do is test it. here is some curl code that shows you what I did to test my view in the Catalina’s API for SL, using Postman and our RESTful API for SL.
The above curl code will bring back all records that have the “Customer ID” field equal to “C300” (in my case, There Can be Only One). You can see what it would look like in Postman here:
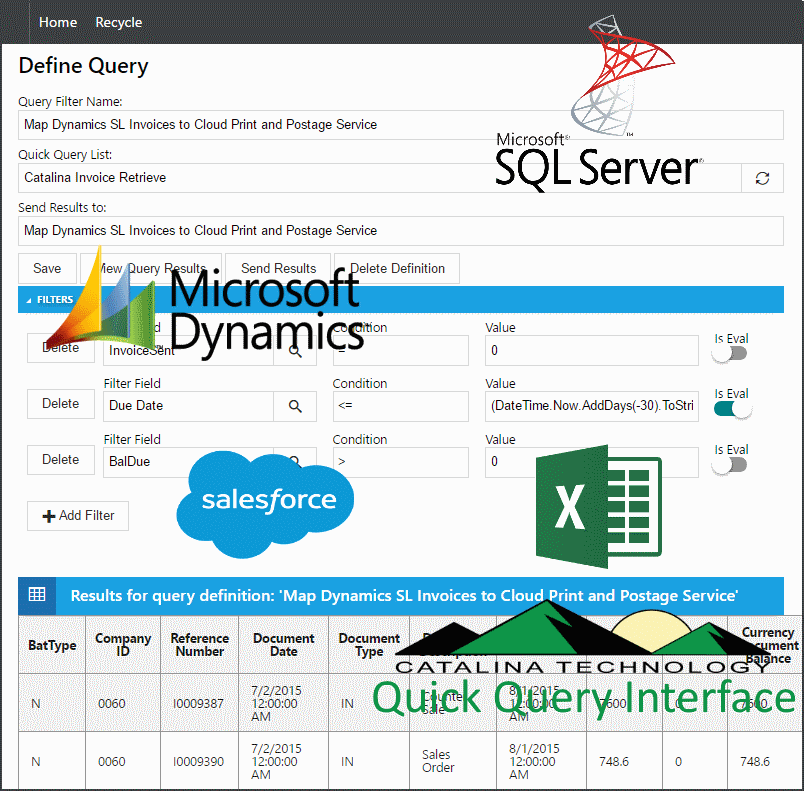
Many of us still have customers, vendors, employees, etc. who require printed invoices, checks, letters, or other documents to be mailed to them. This is a hassle to do. Extracting and formatting the data, mail-merging, printing, folding, stuffing envelopes, postage, and mailing takes time and costs money.
Catalina Technologies’ Cloud based printing and mailing solution automates this process and merges data from your ERP, CRM, helpdesk, or other system and prints and mails these documents for you.
How does this work? We merge your data into a customizable template, print it, and mail it. All on the Cloud! It is just that simple!
(NOTE: You can jump to the end of this post to see a demo of this in action!)
Data Integration
To make life easier, you want your ERP, helpdesk, CRM, or other system to automatically feed the cloud printing and postage so that you don’t have to do manual steps to get your data out of your back office, merged, printed, and mailed. Catalina Technology has a full set of integration tools that allows you to integrate from most ERP’s, CRM systems, Helpdesk, or SQL Query, Excel spreadsheet, CSV, etc. Catalina also has a front-end to Quick Query that allows you to define Quick Query filter definitions that can have custom mapping rules. These Quick Query filter definitions can then be saved and scheduled as automated jobs.
Dynamics SL, GP, and CRM
Salesforce.com
Any SQL Query
Excel spreadsheets
.CSV files
You can call our API from your system
Custom integration
Templating
Templating is an important part of a printing solution. This allows you to be able to customize how data is merged into the output document to any format you want.
These can then be printed as:
Invoices
Letters
Postcards
Holiday cards
Checks
Anything you would normally send to a customer, vendor, employee, business associate, etc!
Demo
Here is a quick demo we did on one of our recent webinars showing how we can receive data from Dynamics SL, merge it into invoices, and then send it out to be printed and mailed to your customers.
[youtube https://www.youtube.com/watch?v=kJGuq5id7pM]
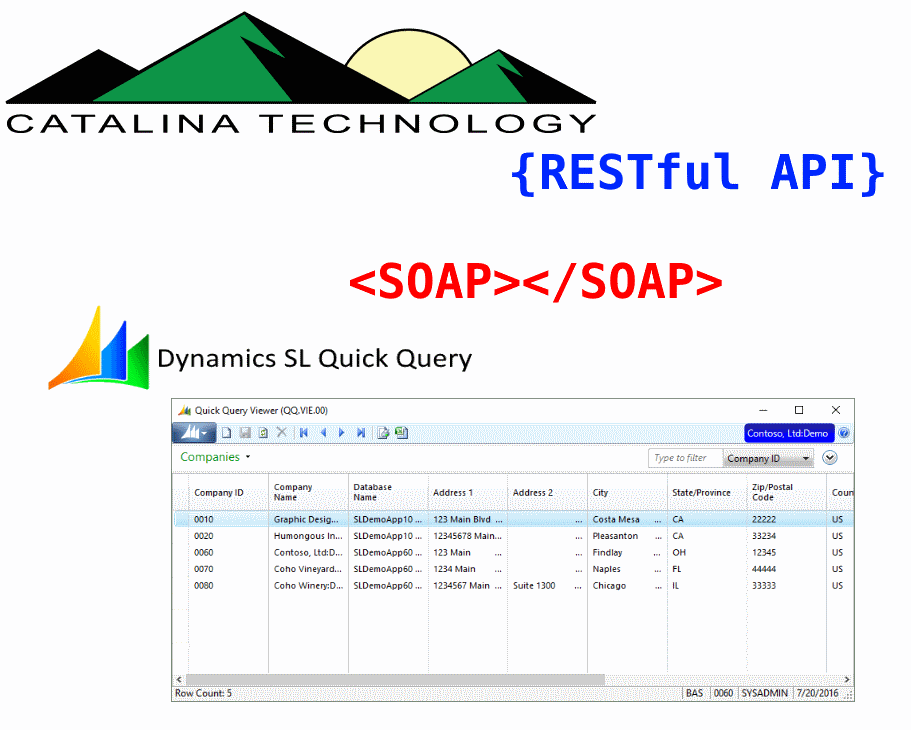
This is an example of how to use Quick Query as a data delivery tool for external systems using Catalina’s API for Dynamics SL. This example is for those who want to use a SOAP based interface.
1.In Visual Studio, we select the Visual C# Template for a Windows Form Application. Our client will be named: client.ctDynamicsSL.quickQuery.
Note: you can call the Catalina web services from any type of client that is able to make http/https calls, but for this example, we will use a Form Application.
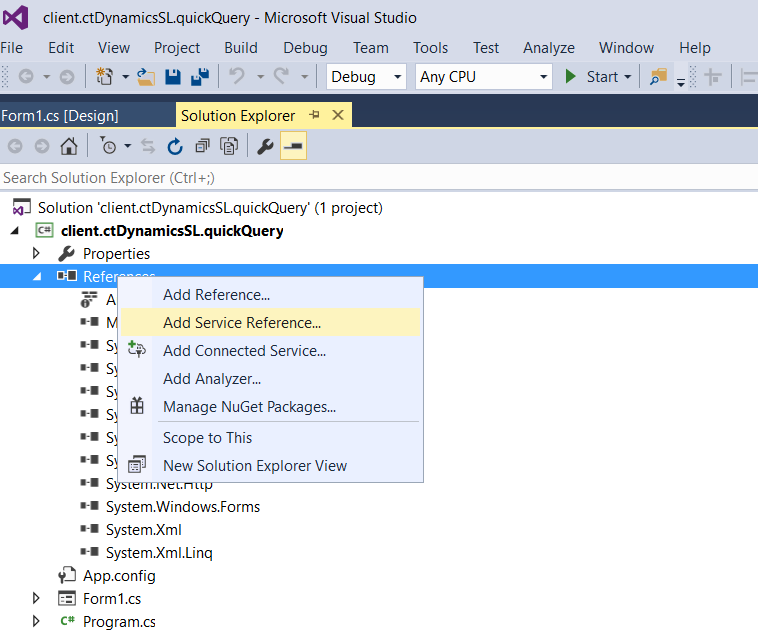
2.Add a reference to our Quick Query Web Service a.Right click on “References” and select “Add Service Reference”
b.On the “Add Service Reference” screen, click the “Advanced” button in the bottom left. (Image: qqcclient3.png)
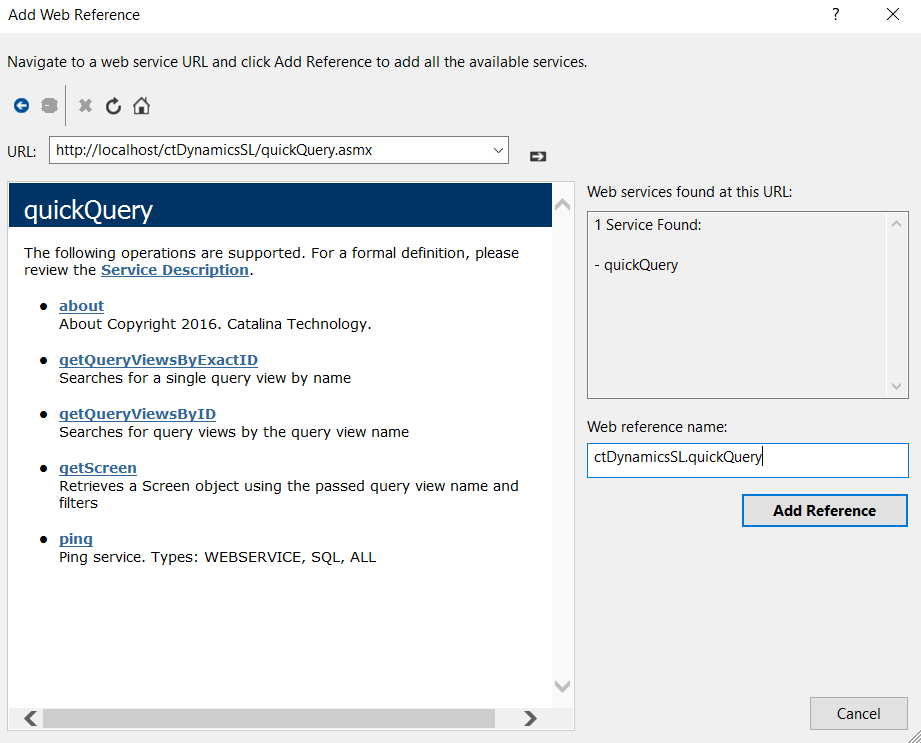
c.On the “Service Reference Settings” screen, click the “Add Web Reference” button. (Image: qqcclient4.png)
d.On the “Add Web Reference” screen, enter in the URL to the web service.
Click the arrow button to discover the web service schema.
After the service definition loads, enter in a name to refer to this service in your client.
E.g.: ctDynamicsSL.quickQuery
e.Click the “Add Reference” button.
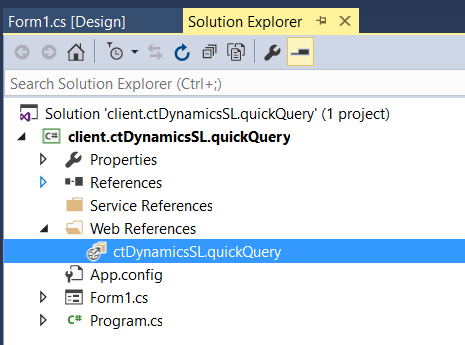
f.The new web reference will show up in your project.
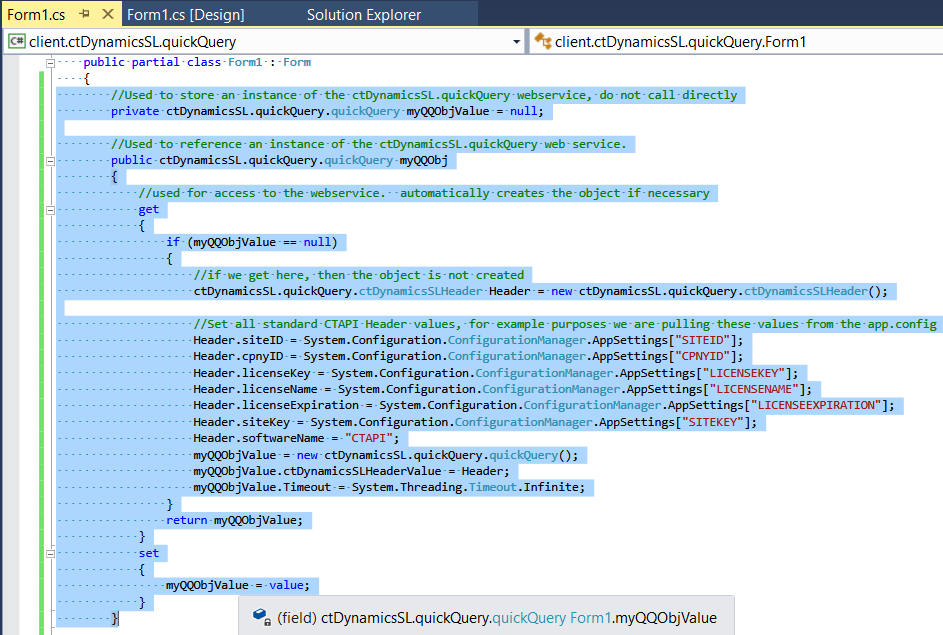
3.Create code to instantiate an object referencing our web service.
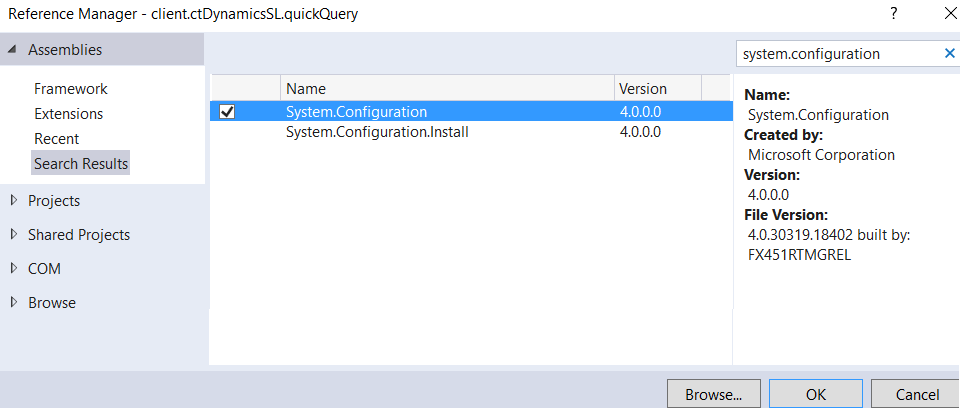
a.I like to store values that are required in the Soap Header in the app.config file using System.Configuration, so we will first add a reference to the System.Configuration assembly. References -> Add Reference -> System.Configuration
b.Create a private variable to store the actual object and a property to auto create the instance if the variable is null. This get{} property will pull the required header values from the app.config
Now whenever we want to call a function in the web service, we just reference it like so: myQQObj.functionName().
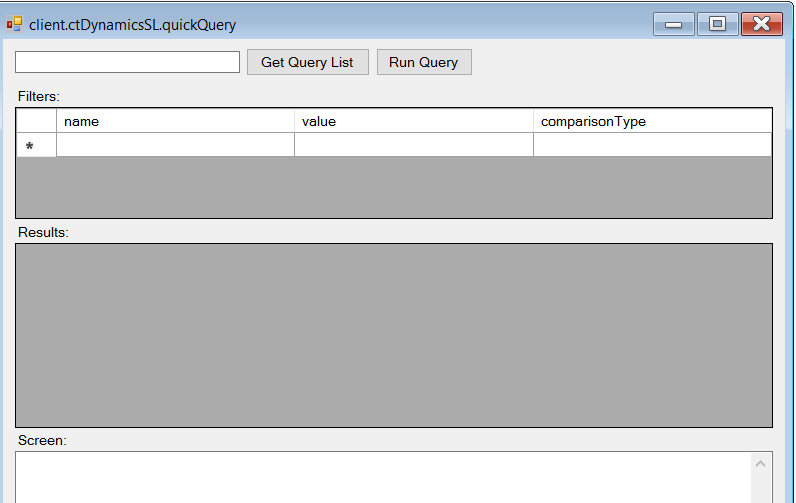
4.Add the necessary elements for our main Form.
a.TextBox for typing in a QueryViewName (tbQueryViewName)
b.Button for a QueryViewName search (btnSearch)
c.Button for executing our search (btnGetQuery)
d.DataGridView for holding our search parameters (dgvFilters)
e.DataGridView for holding our search results (dgvQueryResults)
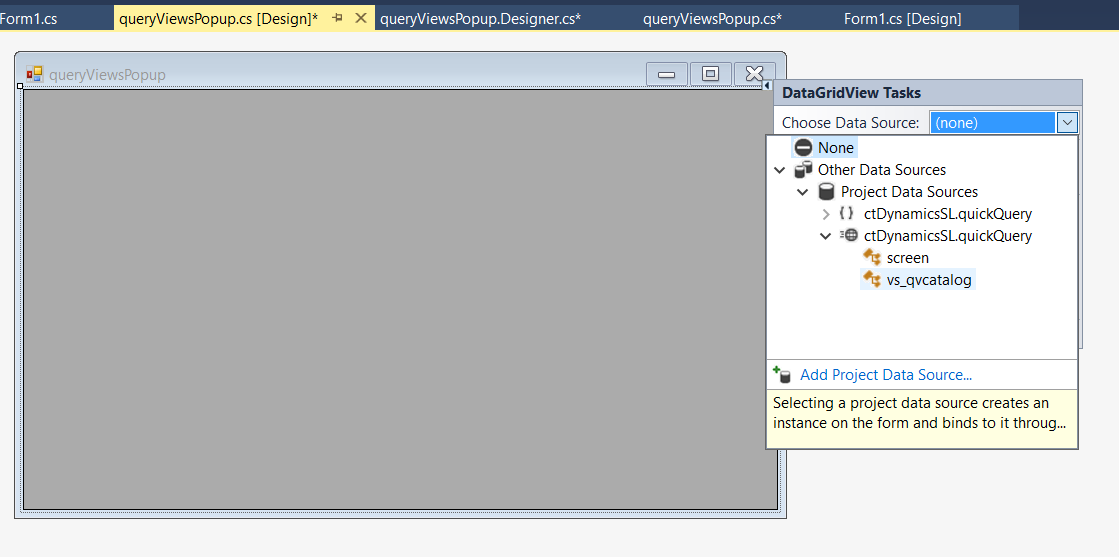
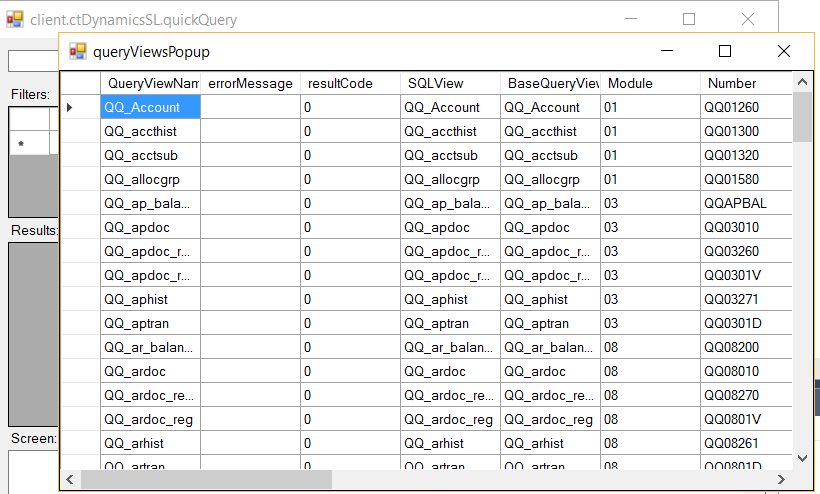
5.Add a popup form for QueryViewName searches.
a.The QueryViewName is the root of the Quick Query Service; they are names of SQL Views built in to SL. This is a required element, so let’s build an easy way to lookup them up.
b.Add another Form object to the project: queryViewsPopup.cs
c.Add a DataGridView to the new Form object.
d.Click on the little arrow at the top right of the Grid and add ctDynamicsSL.quickQuery.vs_qvcatalog as the Data Source.
e.For ease of use, edit the DataGridView Columns.
Move the QueryViewName column to the first position.
Change Name to “QueryViewName” we will use this to reference the cell later.
f.On our main Form, tie an EventHandler to open this form.
g.Add a CellDoubleClick Event Handler, to take the selected row and return the QueryViewName back to the tbQueryViewName on the main Form.
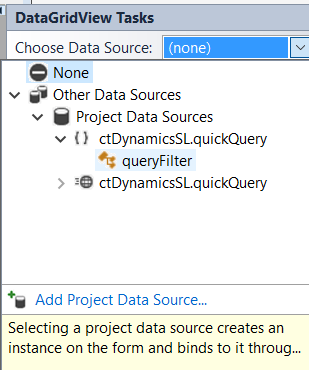
6.Setup Filters DataGridView
a.The Quick Query Service getScreen call requires 2 parameters: queryViewName, filters[]. The filters parameter is of type: ctDynamicsSL.quickQuery.queryFilter.
b.The Filters is an array of triplets holding 3 required fields:
name – This must match the name of a column in the query view)
value – This is the value we are to filter/compare against)
comparisonType – This is any valid SQL comparison operator. E.g.: =, <, >, LIKE, IN, NOT IN
c.Select the Data Source as ctDynamicsSL.quickQuery.queryFilter
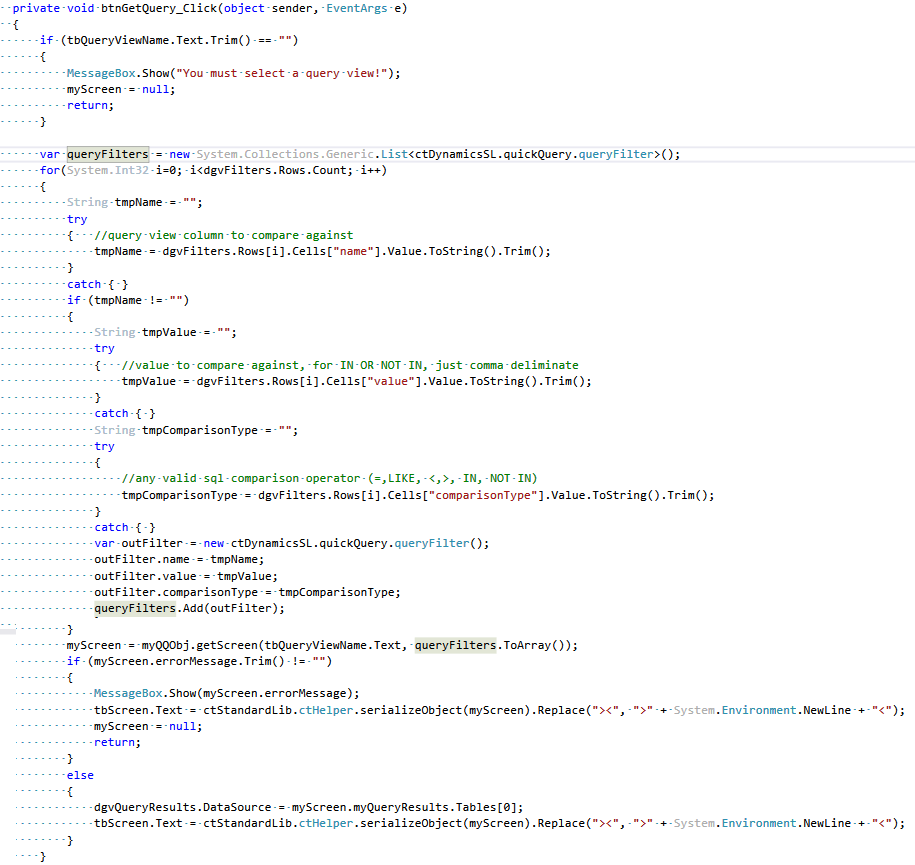
7.The Quick Query Service, is a V2 service by Catalina Technology and by design uses a screen() object for most calls that replicate the SL screen. Create a private variable to hold an instance of the screen object for all of our subsequent calls to the service.
8.Write the code to call the web service, pass the parameters and tie the results to the Result DataGridView (dgvQueryResults)
9.Test our Web Service Client:
a.Find a Query View with our popup.
b.Enter in some filters then Search and View the Results