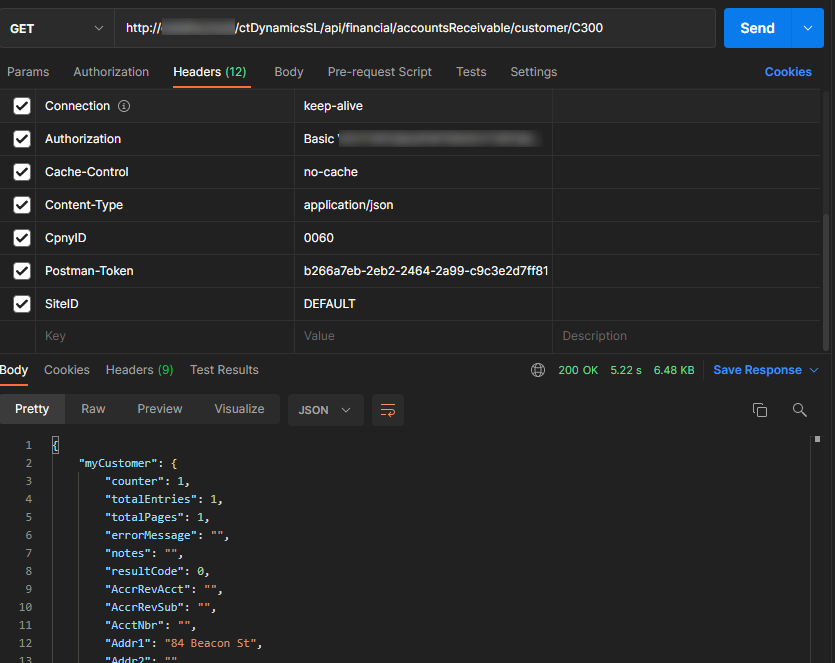
Retrieving a customer is quite simple. You would perform a GET from Catalina’s API (REST) using the following endpoint: /api/financial/accountsReceivable/customer/{CustID}
Example, if you wanted to retrieve customer C300, you would use this endpoint: /api/financial/accountsReceivable/customer/C300
To do this retrieve in Postman, it would look similar to this:
Saving a New Customer
If you want to save a new customer, you would perform a POST to the following endpoint: /api/financial/accountsReceivable/customer (NOTE: you would NOT post a custID in the URL of the endpoint)
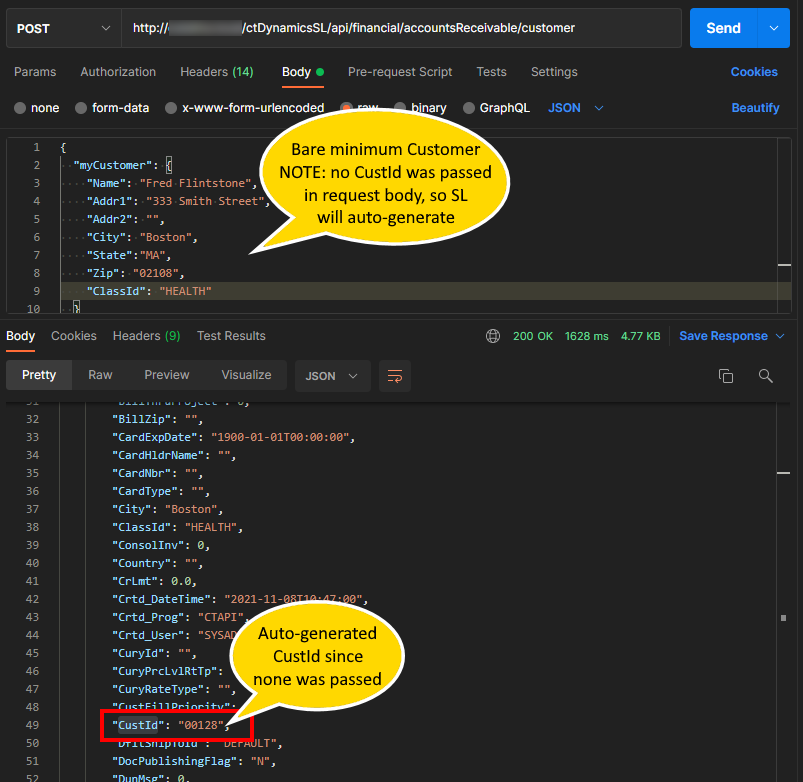
Below is a minimum curl POST that will create a customer. NOTE: if you do not pass a CustID in the request body, SL will automatically select a CustID for you. Also NOTE that if you try to do a POST and pass a CustID in the request body that already exists, the system will give you an error stating that you cant create a new customer with an existing CustID.
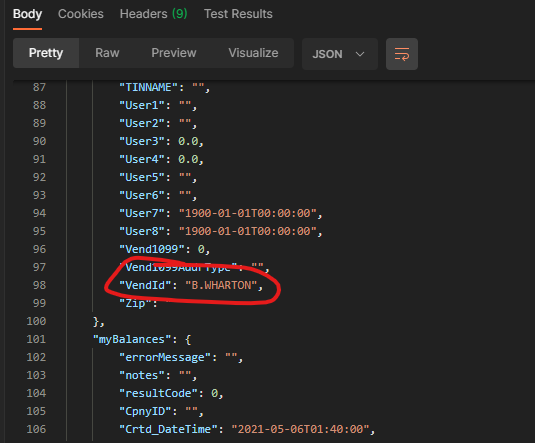
If the POST is successful, the API will pass back the newly saved customer. In the response body, you will see the field myCustomer.CustId. That will be the CustID saved (if you passed a valid CustID or if the system automatically set the CustID if you didn’t pass one in the request body)
It would like like this in Postman:
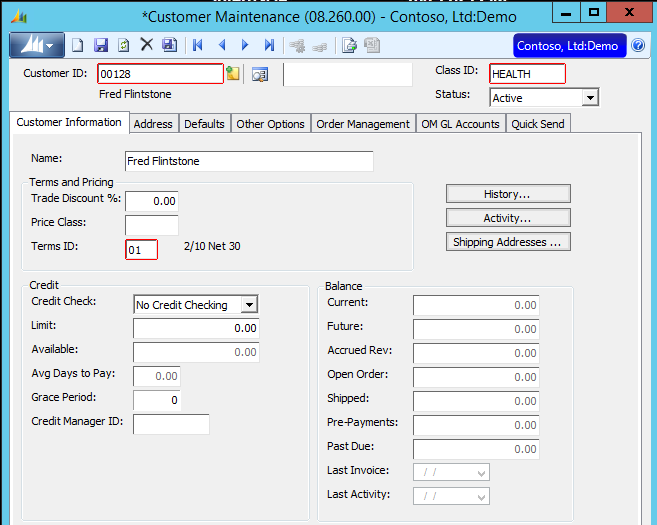
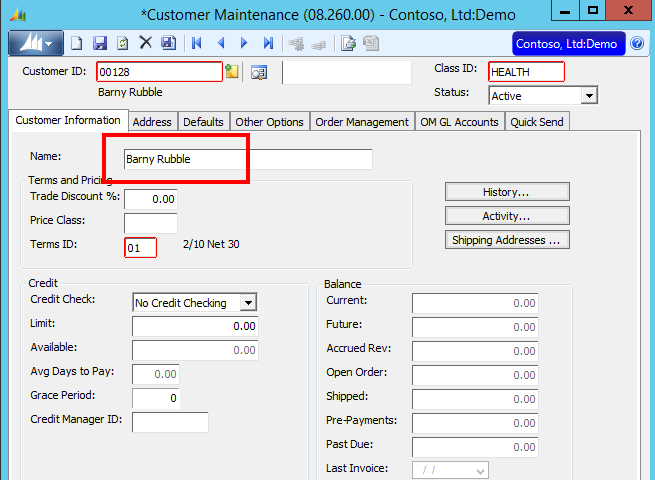
The customer can now be viewed in the SL Customer Maintenance (08.260.00) Screen.
Updating a Customer
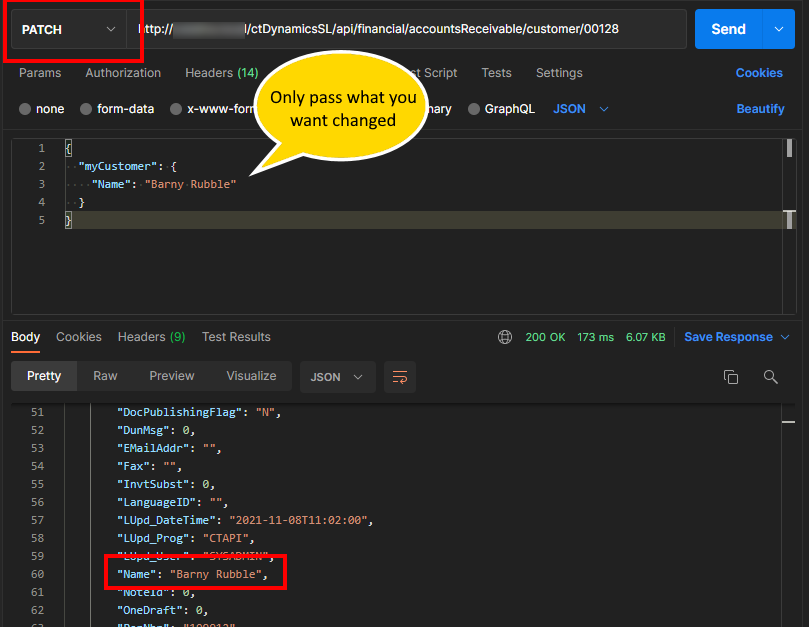
If you want to change a customer, you would make a PATCH call to the following endpoint: /api/financial/accountsReceivable/customer/{CustID}
NOTE: you would replace {CustID}, in the URL, with the Customer ID you want to update. So, if you want to update customer 00128, the endpoint would look like this: /api/financial/accountsReceivable/customer/00128
Regarding the request body, you would only pass the fields you want changed. If you want to change the customer’s name, but you don’t want to change anything else, then only pass the Name field with the value you want to change. So, if I wanted to change customer 00128 to have the customer name of “Barny Rubble” instead of “Fred Flintstone,” I would do a call something like this:
For developers, our SOAP version has the definition of this in the WSDL here (NOTE: we have it separated by function/module depending on what you need to do):
Many are starting to use dotnet core as a development environment for many reasons. It is compact, you can easily deploy to Docker containers, you can run cross platform, and many other reasons.
We get a lot of questions on how to use our API, for Dynamics SL, in a dotnet core environment.
If you want to be able to do something with our REST API or SOAP Web services, you may need to have a place to start. If you check out our github dotNETCore repository, you can see examples of both. You can clone the repository using the git client:
This is because Catalina’s API has security where you need to create a hash and pass that hash of the name of the stored procedure (using the same APIKey setup in ctDynamicsSL) so that when the API retrieves your request for the SQL call, it is using the same shared key for the hash encryption.
If you don’t want to do this, you can look at your DSLConfigFile.xml file. Look in the XML block denoted by the SiteID you are using in your header and make sure that this line is there (with the value = TRUE — All Caps). This will disable that checksum check.
It is easy to retrieve most any data from SL using Catalina’s API for Quick Query. Below is an example of how you can use SOAP and .NET to do this. This example shows yow you can retrieve subaccounts
First, you can also call the QuickQuery API via Postman (using the RESTful API) via below (NOTE: this should bring back all sub accounts since we arent filtering for anything.
Below is .NET code using SOAP. I had registered the SOAP web service quickQuery.ASMX and named it ctAPI.QuickQuery. This code shows you how you can retrieve subaccounts in 2 different ways
The first one just brings back all sub accounts
The second call brings back just sub accounts that contain the word “admin” in the Description
public void RunIt()
{
       // call the web service, requesting the “QQ_SubAccount” quick query to be run. We will pass an empty filter array so that it will get everything
       var returnWithoutFiltering = QuickQueryService.getScreen("QQ_SubAccount", new ctAPI.QuickQuery.queryFilter[0]);
       {
              // I like to convert to a JArray so that I can do other things with it.  but lets loop through each row
              Newtonsoft.Json.Linq.JArray myArry = Newtonsoft.Json.Linq.JArray.FromObject(returnWithoutFiltering.myQueryResults.Tables[0]);
              foreach (var myVal in myArry)
              {
                     Console.WriteLine($"SubAcct: {myVal["Subaccount"].ToString().Trim()}, Descr: {myVal["Description"].ToString().Trim()}");
              }
       }
       Console.WriteLine();
       // lets filter all sub accounts that contain the word "admin" in the description
       var myFilters = new List<ctAPI.QuickQuery.queryFilter>
       {
              new ctAPI.QuickQuery.queryFilter {name = "Description", comparisonType = "LIKE", value="%admin%" }
       };
       // call the web service, requesting the “QQ_SubAccount” quick query to be run. Passing the myFilters array for filtering
       var returnWithFiltering = QuickQueryService.getScreen("QQ_SubAccount", myFilters.ToArray());
       {
              // I like to convert to a JArray so that I can do other things with it.  but lets loop through each row
              Newtonsoft.Json.Linq.JArray myArry = Newtonsoft.Json.Linq.JArray.FromObject(returnWithFiltering.myQueryResults.Tables[0]);
              foreach (var myVal in myArry)
              {
                     Console.WriteLine($"SubAcct: {myVal["Subaccount"].ToString().Trim()}, Descr: {myVal["Description"].ToString().Trim()}");
              }
       }
}


private ctAPI.QuickQuery.quickQuery _quickQueryService = null;
public ctAPI.QuickQuery.quickQuery QuickQueryService
{
       get
       {
              if (this._quickQueryService == null)
              {
                     this._quickQueryService = new ctAPI.QuickQuery.quickQuery
                     {
                           Timeout = 300000,
                           ctDynamicsSLHeaderValue = new ctAPI.QuickQuery.ctDynamicsSLHeader
                           {
                                  siteID = "YOURSITEID",
                                  cpnyID = "YOURCPNYID",
                                  licenseKey = "YOURLICENSEKEY",
                                  licenseName = "YOUR LICENSE NAME",
                                  licenseExpiration = "1/1/1900",
                                  siteKey = "YOURSITEKEY",
                                  softwareName = "CTAPI"
                           }
                     };
              }
              return this._quickQueryService;
       }
       set
       {
              this._quickQueryService = value;
       }
}
Below here is the data structure of a subaccount from the Quick Query QQ_SubAccount
Catalina’s RESTful API for Dynamics SL uses BASIC authentication. You can manage your authentication using Catalina’s ctConfigEditor.exe tool. This is normally installed on the API Web server in the c:\inetpub\xctFiles\ctConfigEditor folder. It may be different on your server so you may need to contact your IT administrator. The executable is ctConfigEditor.exe.
You will first need a few pieces of information from the web.config file of your ctDynamicsSL folder (the location where Catalina’s web services/API resides). The folder is normally located at: c:\inetpub\xctFiles\web\ctDynamicsSL. But could be in another location based on your server setup. You may need to contact your IT administrator to find out where it is.
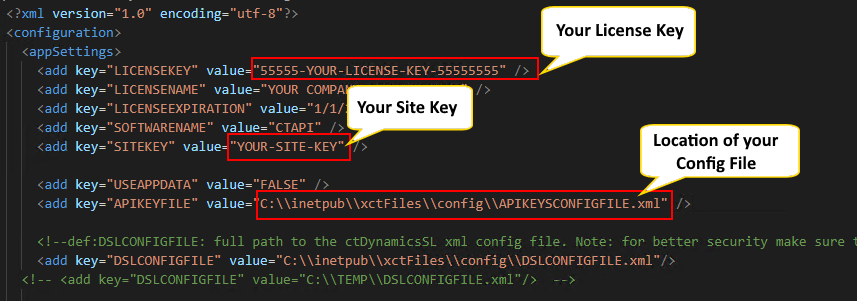
Looking in the web.config, you should see several keys in the appSettings section that is required for ctConfigEditor to be able to read your authentication file:
LICENSEKEY
SITEKEY
APIKEYFILE
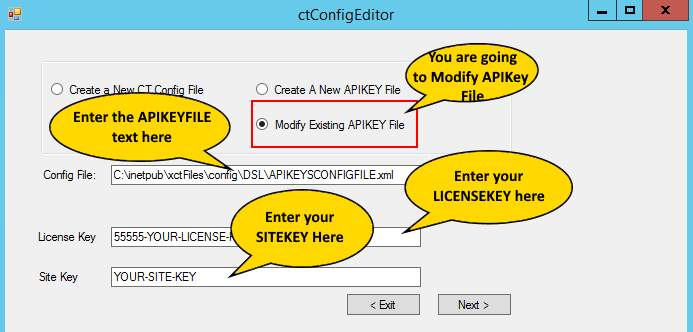
Once you have your licensekey, sitekey, and apikeyfile, you can run the ctConfigEditor tool.
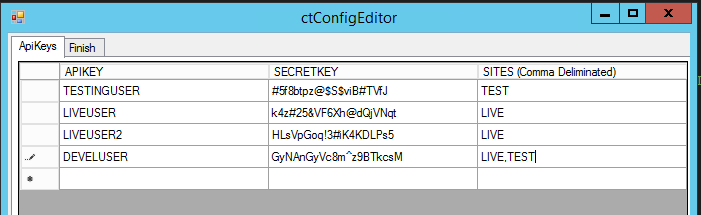
Make sure you have the radio button “Modify Existing APIKEY File” as shown above. Then enter the APIKEYFILE in the Config File text box, the LICENSEKEY in the License Key text box, and the SITEKEY in the Site Key text box. Then you can press the “Next” button to be able to enter your API Keys for BASIC authentication.You can now edit/add/delete users for access to the system. There are 3 fields for each user:
APIKEY: this is the username that the user would be using in the RESTful API basic authentication
SECRETKEY: this is the password that the user would be using in the RESTful API basic authentication
SITES: This is a comma delimited list of sites the user can access
So, in the above example, I have 4 users
TESTINGUSER: This user can only access the TEST site
LIVEUSER and LIVEUSER2: These users can only access the LIVE site
DEVELUSER: this user can access both the LIVE and the TEST site
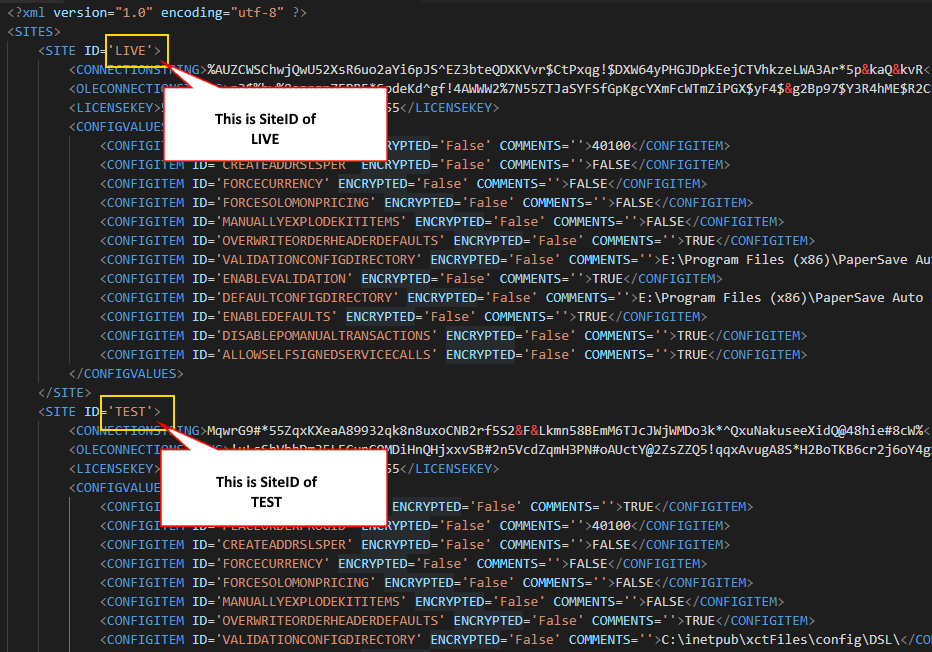
NOTE: Sites are basically configurations in Catalina’s API that point to different database strings and configurations. If you look in your web.config file, of the ctDynamicsSL folder, you can see an appSettings key called DSLCONFIGFILE. This is the location of a configuration file that has all the different sites setup. Below is an example of what a DSLCONFIGFILE would look like. You can see that there are 2 separate sites. Each with their own connection strings and configurations.
NOTE: Do not change your DSLCONFIGFILE unless you intend to change settings. This tutorial is NOT about DSLCONFIGFILE but about your API Keys.
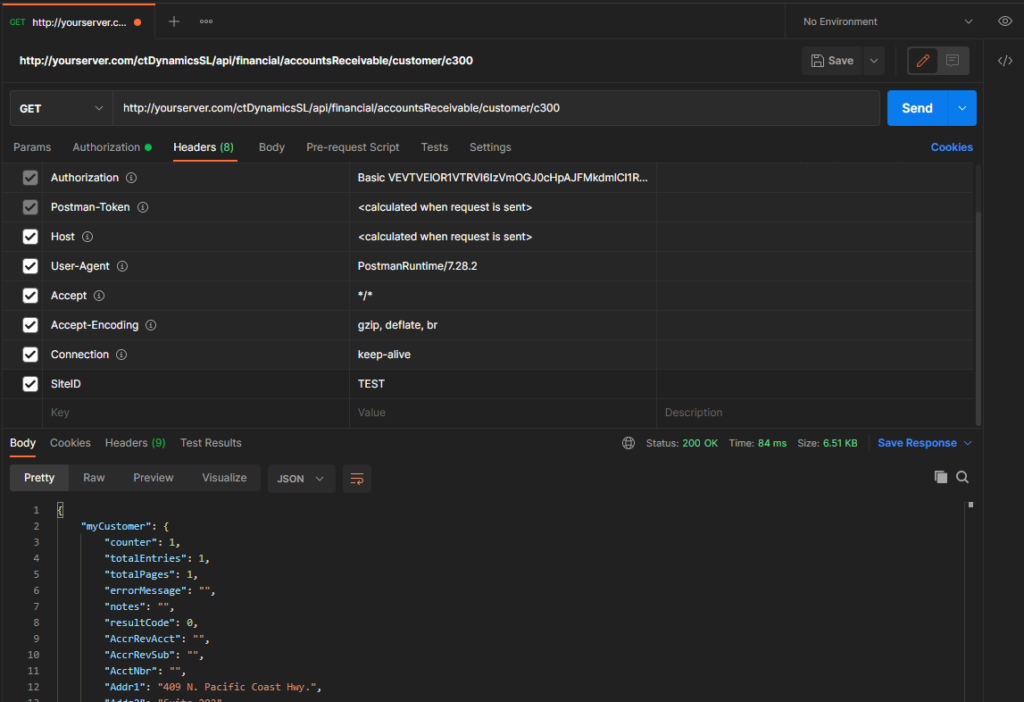
So, now that we have our API Keys setup, lets do an example. If we want to use the following:
Use the TESTINGUSER API Key (with it’s password of “#5f8btpz@$S$viB#TVfJ”)
We are going to use the TEST SiteID
We will have a server name of yourserver.com
We want to retrieve the Customer “C300” from SL using the customer endpoint
NOTE: to create the authorization string, you would take the username and the password and create a string like this: “TESTINGUSER|#5f8btpz@$S$viB#TVfJ” and then base64 encode it. You will get the following value: VEVTVElOR1VTRVJ8IzVmOGJ0cHpAJFMkdmlCI1RWZko=
To create the header for “Authorization.” Take the base 64 encoded value and put “Basic” in front of it. Your end result would be the following: “Basic VEVTVElOR1VTRVJ8IzVmOGJ0cHpAJFMkdmlCI1RWZko=”
Looking at it in Postman looks like the following:
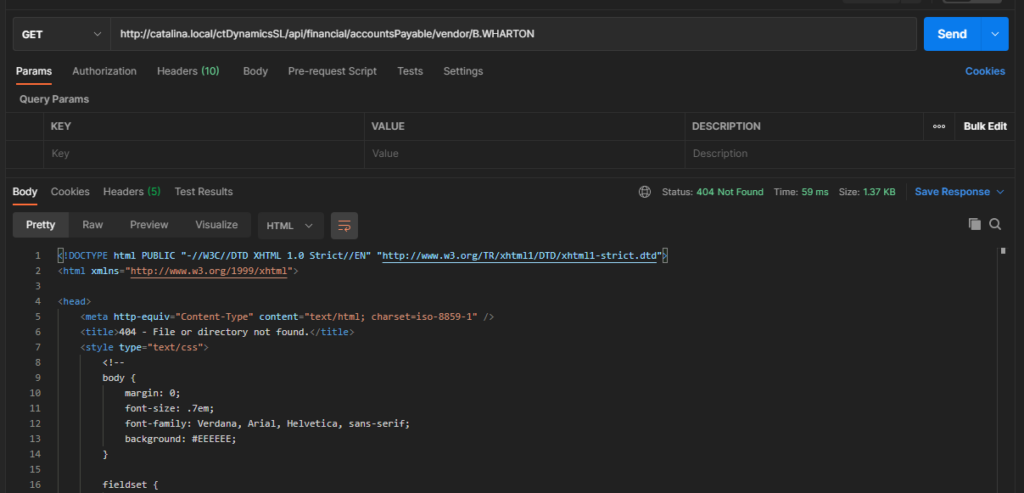
What happens if you are using Catalina’s API for Dynamics SL and your ID you are searching for (example a CustID, Vendor ID, etc) has a period in it? It will fail with standard installation. This is because the .NET web application is looking for a period in the final parameter so that it can route.
You will get a return that looks something like this with a 404 status and HTML coming back:
This can be solved by changing the web.config.
NOTE: if you make this change, then you wont be able to run SOAP and REST in the same application. SOAP will stop working and you would need to install a separate instance with it’s won web.config to make this work.
If you look in the Web.config, you will see the following line:
SLQuickCollect is Catalina’s solution that allows you to email or SMS message out a simple link to your customer as a request for payment.
Custom properties are a way to personalize the emails that go out to the customer. As well as the payment page and receipts they see. You can have an unlimited number of parameters with whatever text you want to send to the customer. And you can place it anywhere you want on the email and page templates.
Here is a quick demo on how you can do this via a RESTful API. And how to modify the templates to display the parameters.
Below is an example of a payload that you would send to the SLQuickCollect API.
CustID: The Customer ID of the customer you are sending the payment request to.
Amount: The amount you want to collect
PaymentEmailList: A delimited list of emails that the request is going to go to.
Properties: This is a list of properties as Name/Value pairs. You can create as many of these properties as you want. And then you can display them in the email, payment page, receipt email, and receipt page templates any way you want.
When you want to display a custom property on a template page, you use this ASP.NET format:
<%=getProperty(“PropertyName“)%>
So, if the property name is “COMMENTS”, you would use this:
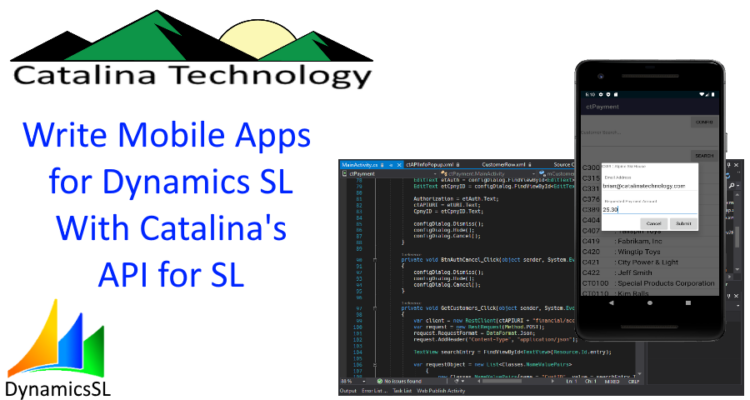
This is a demo that shows you how to create a mobile app to interact with Dynamics SL to provide a “Contact Free” payment solution to help protect your employees and customers during COVID 19. The intended user of this example app would be a customer service rep, sales person, or field service rep who needs to collect payment from a customer (handy for collecting a deposit or down payment before delivery, installation, or service work to be done).
This demo uses Catalina’s API to search customers in SL and then lets the user to request a payment from a customer by generating a link and emailing it to the chosen customer. That customer then can click on the link and pay the amount which automatically creates a payment in SL’s AR.
Check out the video of the demo on our Youtube channel here:
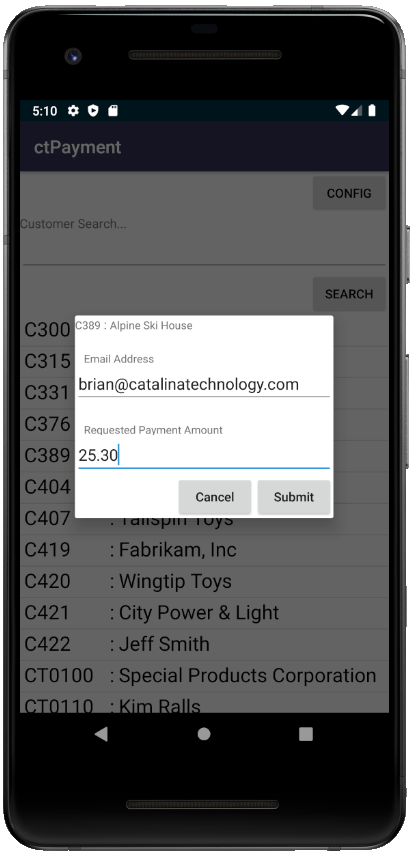
Below is a screenshot of the Android app from the above demo. First you can search for a customer by a keyword. That search will then bring back a list of results. You can then click on the customer you want to request funds for. The app will automatically fill in the email address of the customer (from the Customer record in Dynamics SL). You can change the email address if you want. You then enter a requested payment amount and hit submit. Once you do this, Catalina’s SLQuickCollect will send off an email to the customer with a link which will then allow them to make a PCI compliant secure payment. Once authorization occurs, SLQuickCollect will then create a payment in Dynamics SL automatically.
As mentioned below, if you want to have starter code on creating an Android App (with Visual Studio and Xamarin), you can check out an example on our Github here (NOTE: I would only consider this a starter. This is in no means something finished but enough to get you started)
Many of Catalina Technology’s stored procedures accept a field called @parms that is an XML field for configurable parameters to be passed. An example of this is below.
You can see that there is a parameter getting passed called “@parms”. In that is a XML string that contains one or more parameter. In this case, there is a single parameter called “ADDRID” and it is getting passed the value of “C%” so that it can return all addresses that start with a “C”