Using Swagger and Postman to test Catalina’s API for Dynamics SL (REST version)
Often, you don’t want to code out a client to run quick tests for an API. Example, you might just want to retrieve a record or maybe you want to see what the return looks like when you post data to the API. Writing a client can be a lot of work when all you need to do is just test things out.
You can do quick API calls by using Swagger and Postman. This article is to show you how you can use Swagger to generate code so that you can then use the power of Postman to further test and work with the API.
First: You are going to want to go to the Swagger documentation of your API. Every REST installation of the Catalina API for SL has this. You should be able to access it by:
http://<yourservername>/<Path to service>/swagger
where you replace <yourservername> with the actual server that the API is installed on. and <Path to service> to the virtual location of the service on that server. Example: if your server is called www.apicomputer.com and the path to the API is: ctDynamicsSLWebAPI, you would have a URL like this:
http://www.apicomputer.com/ctDynamicsSLWebAPI/swagger
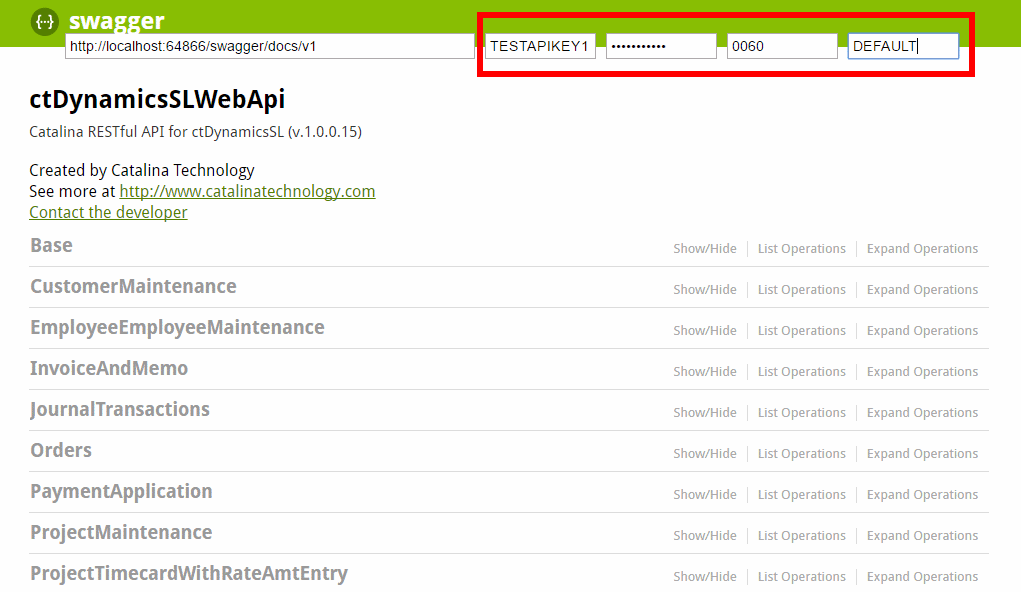
Second: Once Swagger loads, you will see something like below. Note the red outline showing where you need to enter your APIKey, Password, CpnyID, and SiteID for validation and which settings and company you are working with.
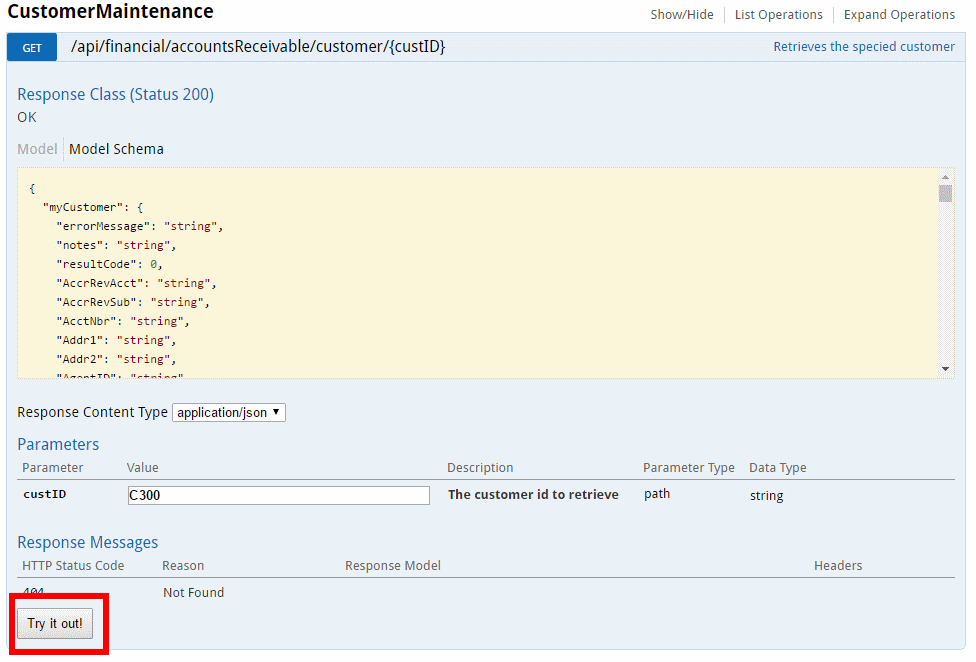
Third: After you have filled in the validation credentials, you can then open the object you want to work with. In the below case, I am looking at CustomerMaintenance and I want to get a customer by a CustID.
Go ahead and fill in any parameters (in this case, I am filling in the required custID with “C300” as a valid Customer ID in my SL system) and then hit “Try it out!”
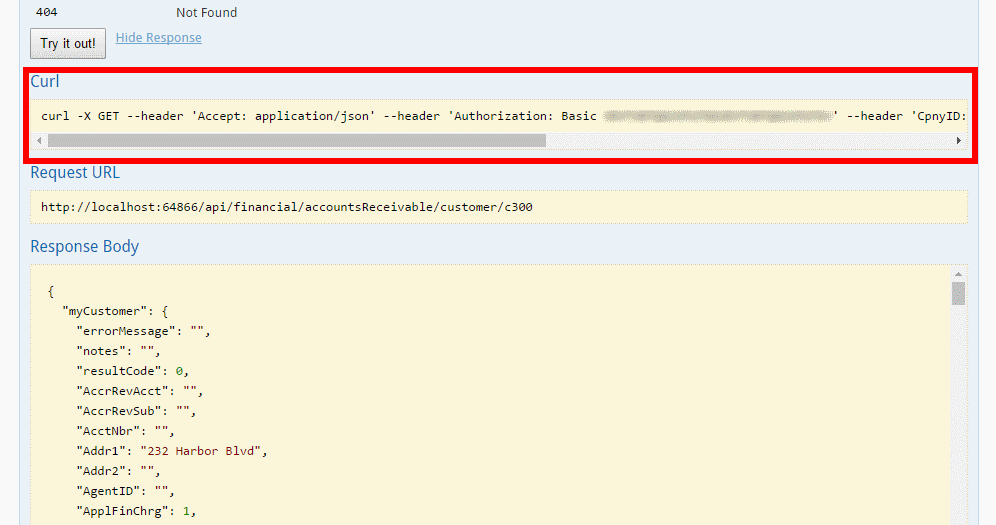
Fourth: If there is data for that custID passed, then you will get a return similar to the one that I have below. You can see the Response Body with the actual data I requested. But take special notice of the information in the “Curl” section that I have red-boxed. This is code that you can use to import this information to Postman. If you copy this bit of code, it will have all the authentication, header, and body information it would take to do an actual RESTful API call in Postman or most any other REST client. Copy the text in the Curl section.
Fifth: Now you can paste that Curl code from Swagger into Postman. If you load Postman, you will see something like this at the top left of the application. Click on the “Import” button.

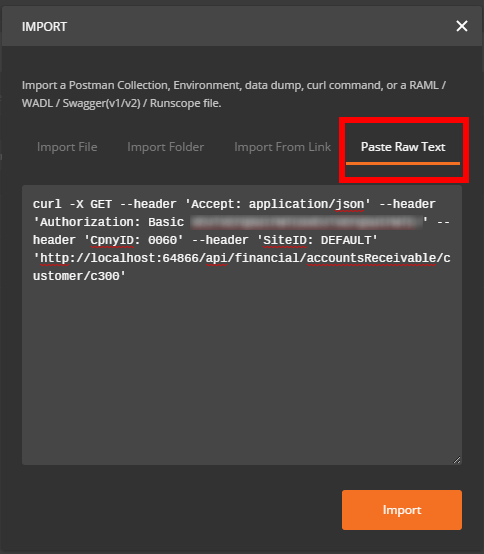
Sixth: You will then see a screen similar to what is below. Choose the “Paste Raw Text” tab and then paste your Curl code into the box provided. You will see how it has all the header, authentication, and body code there. Once the Curl data is pasted, then hit “Import”
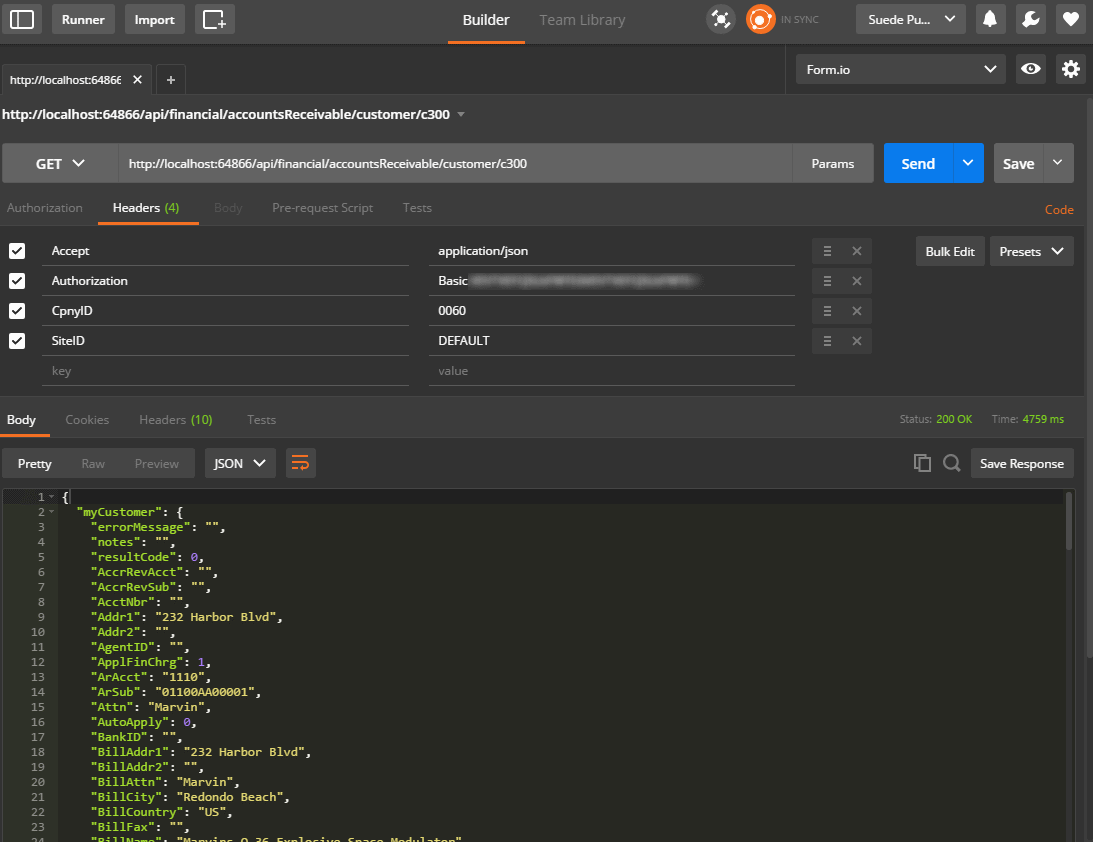
Once imported, you can then see everything is automatically filled into Postman. Now you can do whatever you want with Postman. Change body, change parameters, headers, whatever you can do with Postman. You just had most of the heavy work done by just copying and pasting between Swagger and Postman.
