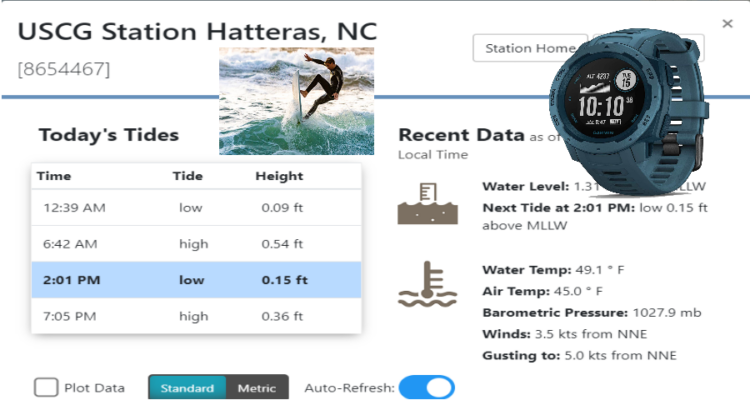
We aren’t just business here on the blog. We often work on other projects for fun and to keep our programming skills tight. This one is to help us predict the best time to go surfing.
If anybody has the standard Garmin Instinct watch and wants Tide information on their watch is out of luck since Garmin wants you to spend twice as much to buy the fancy expensive Surf edition watch.
There is kinda a workaround by importing data into a Google Calendar with data from NOAA that will schedule events for the predicted tides. So, I decided to write a .NET Core app that goes out to NOAA and pulls back tide predictions, for a station ID that you specify, and a date range to get the predictions. It will then write that information to a CSV file that you can upload to a google map and then sync to your watch.
The .NET Core app will run on most any machine that has .NET Core installed (Windows, Mac, Linux). It will allow you to pass parameters for beginDate, endDate, station ID (from NOAA) and a filename to output the CSV to. What I did is just run it from 1/1/2021 through 12/31/2021 so that I can populate data for the entire year.
I did a demo on how to manage API Keys, for our RESTful API for Dynamics SL, using PowerScript. We are rolling out PowerScript management and installation tools for our products. Please contact us (sales@catalinatechnology.com) if you are interested in receiving an early release.
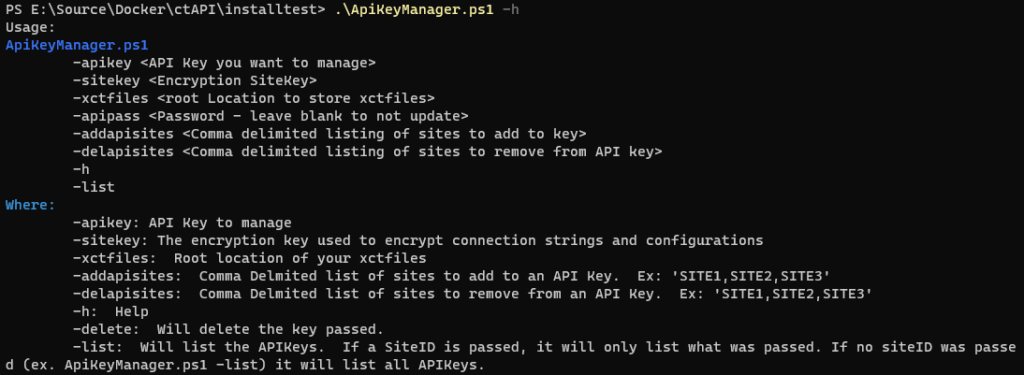
sitekey: The encryption key used to encrypt connection strings and configurations
xctfiles: Root location of your xctfiles
addapisites: Comma Delmited list of sites to add to an API Key. Ex: ‘SITE1,SITE2,SITE3’
delapisites: Comma Delmited list of sites to remove from an API Key. Ex: ‘SITE1,SITE2,SITE3’
h: Help
delete: Will delete the key passed.
list: Will list the APIKeys. If a SiteID is passed, it will only list what was passed. If no siteID was passed (ex. ApiKeyManager.ps1 -list) it will list all APIKeys.
Examples
If you want to get a listing, you would enter: ./ApiKeyManager.ps1 -h
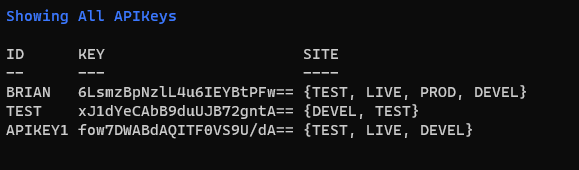
Passing the -list parameter will get you something similar to this
If you want to create a new API Key with the username = “APIKEY1”, password = “Passw0rd1”, give access to 3 sites (“TEST”, “LIVE”, “DEVEL”), your SiteKey (encryption key) is “1234567”, and the location of your xctfiles is c:\inetpub\xctFiles, you would enter the below:
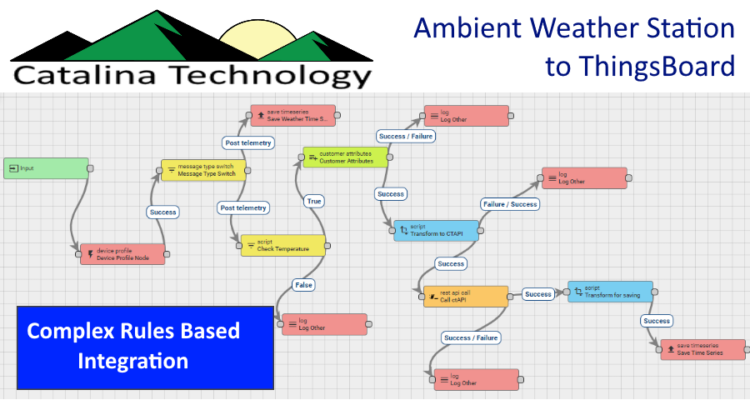
At Catalina Technology, we are “Weather Bugs.” Living on Hatteras Island, we get our fair share of weather so we like to keep track of it through various IOT devices and weather stations. Since we collect a lot of data, using a tool like ThingsBoard to retrieve the data and build rules against the data coming in (alarms to tell us to close the windows when it is raining) and dashboards.
This is a demo on how you can connect an Ambient weather station to thingsboard.
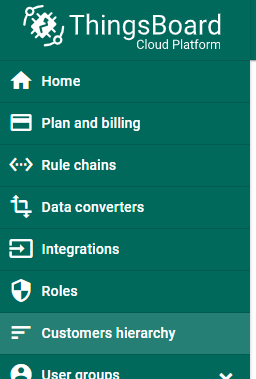
First, you need to make sure you have a customer created. You can go to the customers hierarchy and either make sure you have an existing one or create a new one.
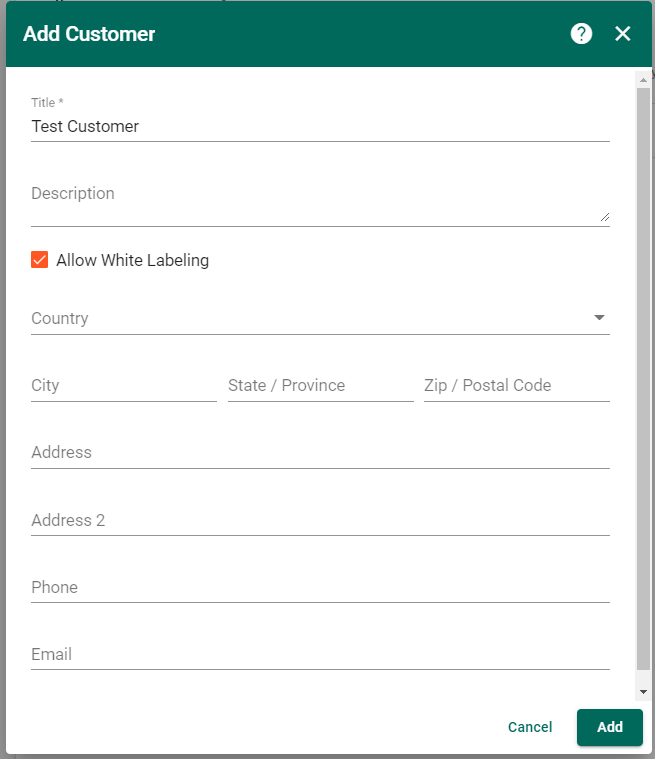
Since I have a fresh ThingsBoard site, I am just going to create a new customer called “Test Customer” and save it.
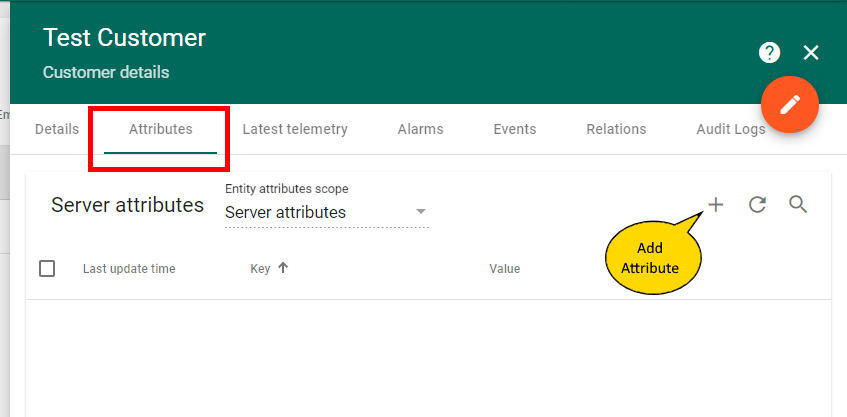
After you have a customer, click on that customer (in the customer hierarchy) and click on the Attributes Tab. What we are going to want to do is store our secret API and Application keys given to us from Ambient.
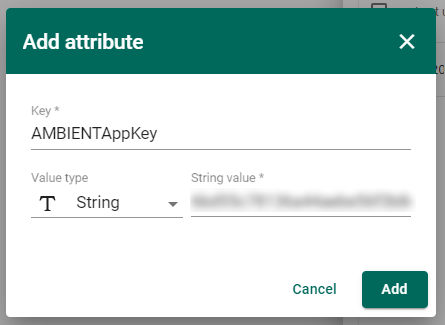
I am going to create an attribute called AMBIENTAppKey. This will be used later on when we make the API call to Ambient’s RESTful API.
I also did the same for the API key and created an attribute named AMBIENTAPIKey (NOTE: I have blurred out my keys so that someone doesnt gain access to my weather station)
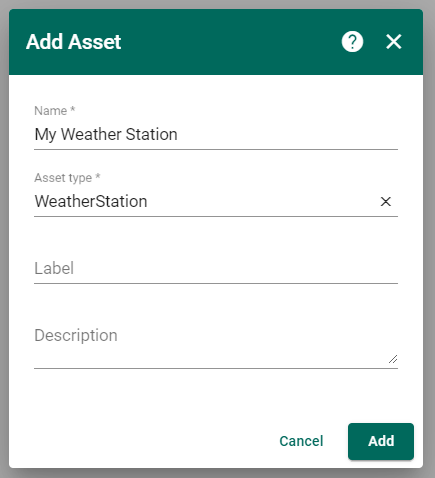
Next, expand your customer and then go into the asset groups and click on All. We are going to add an asset for the weather station.
For lack of a better name, I just named my weather station asset “My Weather Station” and gave it an asset type of WeatherStation.
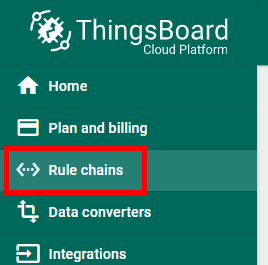
Now we are going to write the actual rules. Go to “Rule Chains”
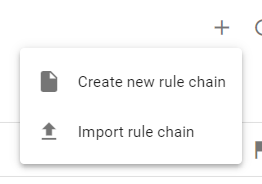
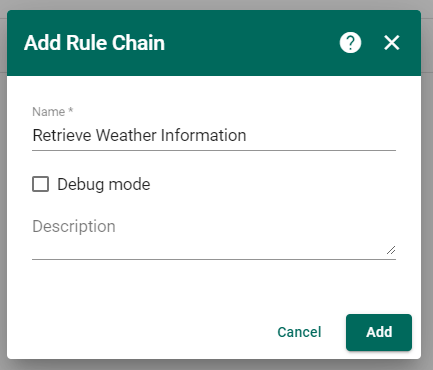
We are going to create a new rule chain.
Since this rule chain is going to be retrieving data from Ambient’s RESTful API and then tying it to the asset we created, I am just going to name this “Retrieve Weather Information”
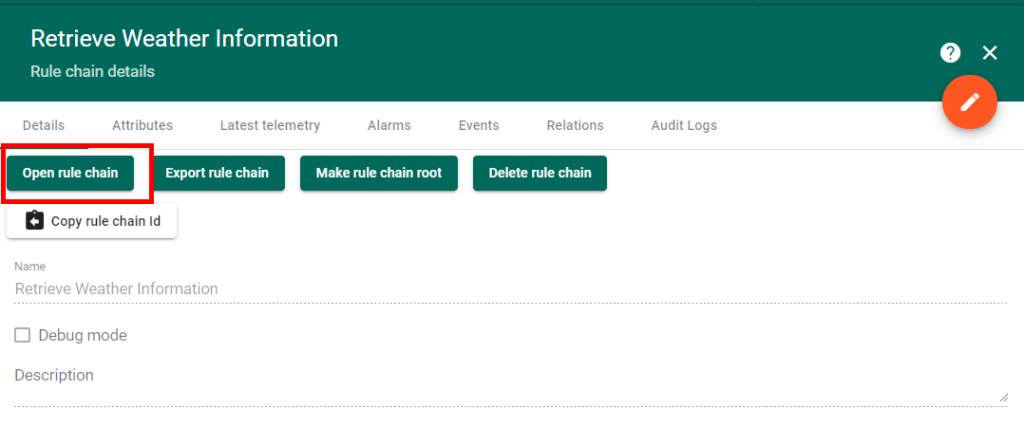
Once the rule is created, click on it and then click on the “Open rule chain” button.
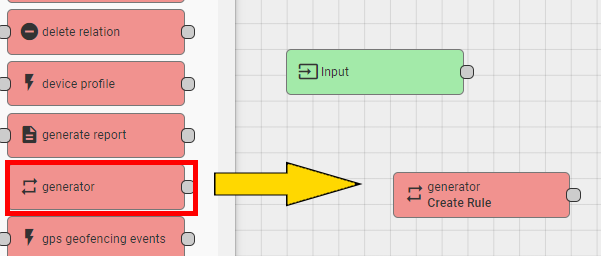
Now we are going to use the “Generator” rule node. Just simply drag it out to the work surface.
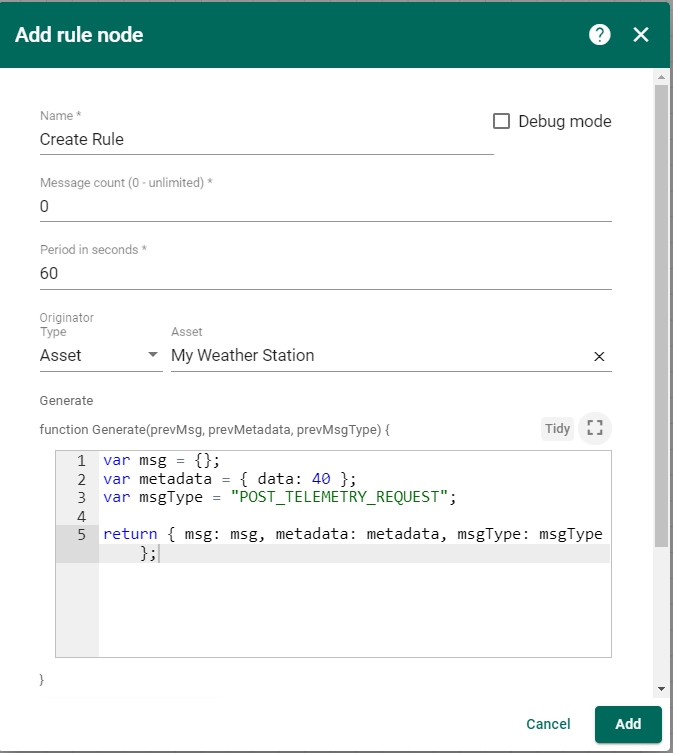
What a generator rule node does is allow us to create a timer event against a particular asset or other entity in the system. In our case, we are going to just point to the Asset “My Weather Station”. And we are going to change the guts of the code to just use an empty msg.
Here is the code so that you can cut and paste
var msg = {};
var metadata = { data: 40 };
var msgType = "POST_TELEMETRY_REQUEST";

return { msg: msg, metadata: metadata, msgType: msgType };
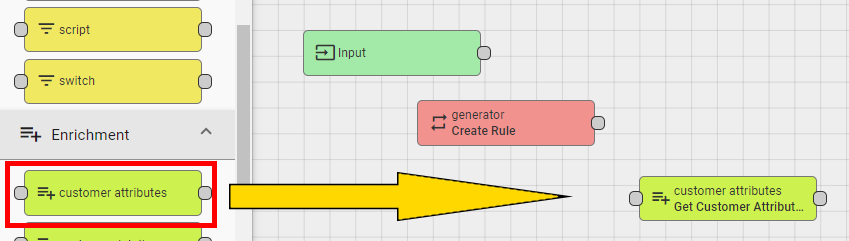
Next, we want to get access to the customer attributes (AMBIENTAPIKey and AMBIENTAppKey) so that we can use them. Just drag the customer attributes out
A popup will be shown. Enter the below. What we are doing is taking the source attribute (tied to the customer) and then making it a variable that we can use. You could change the name of the attribute if you want. But it is just easier to keep it the same. So, make the Target attribute names the same as the Source attribute names.
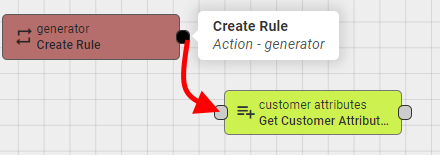
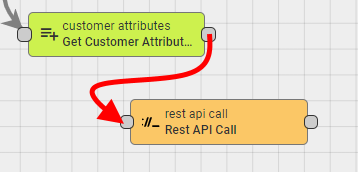
Once you save the above, you will then want to link the generator node to the customer attributes. Just grab the little circle on the right of the generateor node and drag it to the left of the customer attributes node.
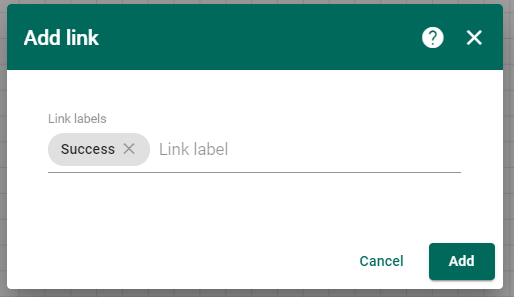
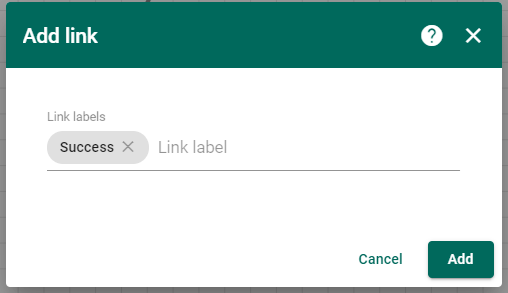
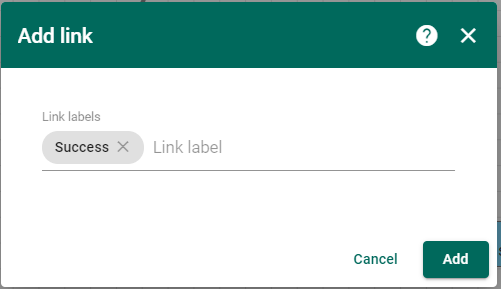
It will ask you what the link should be. We want to go to the next step if there is a success.
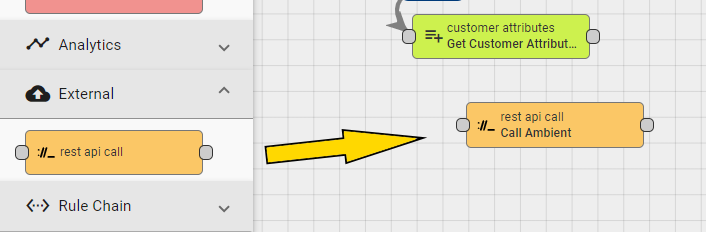
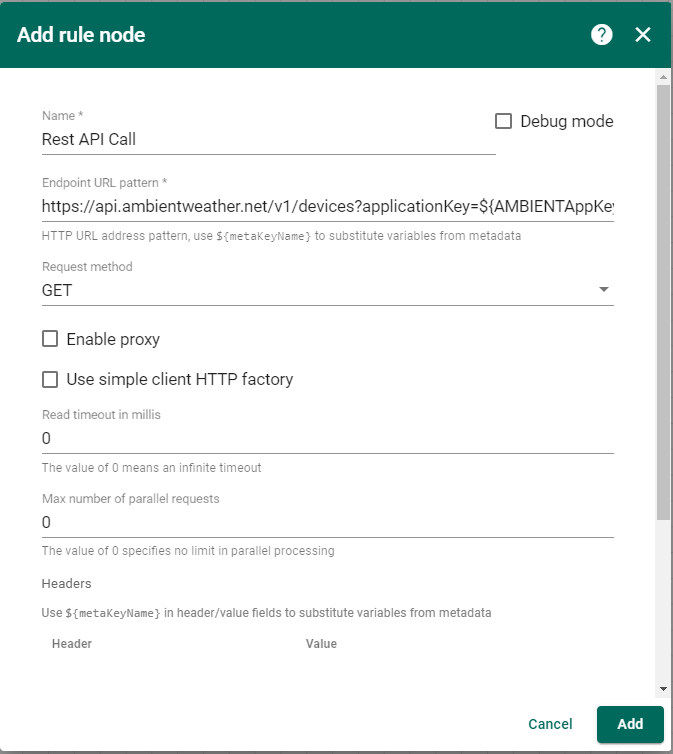
Next, drag out the rest api call node to the work surface so that we can then call Ambient’s API.
A popup will be shown. I just named this “Rest API Call” and then entered the endpoint for the Ambient API. NOTE: you will see how I replaced the actual key with a customer attribute. Also NOTE that this is a “GET” Request method.
Below is what the URL looks like with the attribute key variables embedded. What the Rest API Call node will do when it executes is replace those variables with the values stored under the customer’s attributes with the same name.
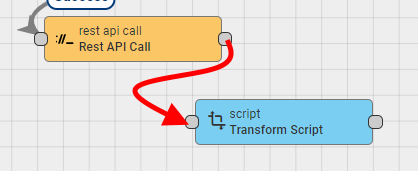
And link the Rest API Call node to the transformation script.
Making sure that we do this on success. What this will then do is take the output of the API call and pass it to the script for transformation.
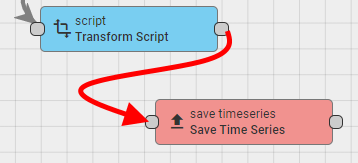
Now, we just want to simply save the transformed data. It will be saved against the asset we are working on.
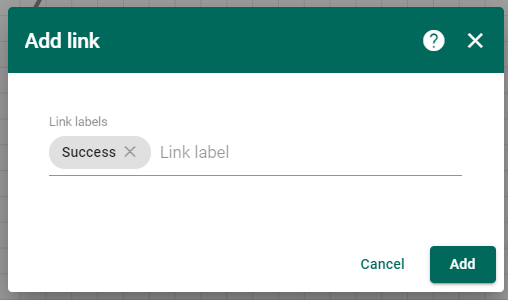
And link the transformation script to the time series node for success.
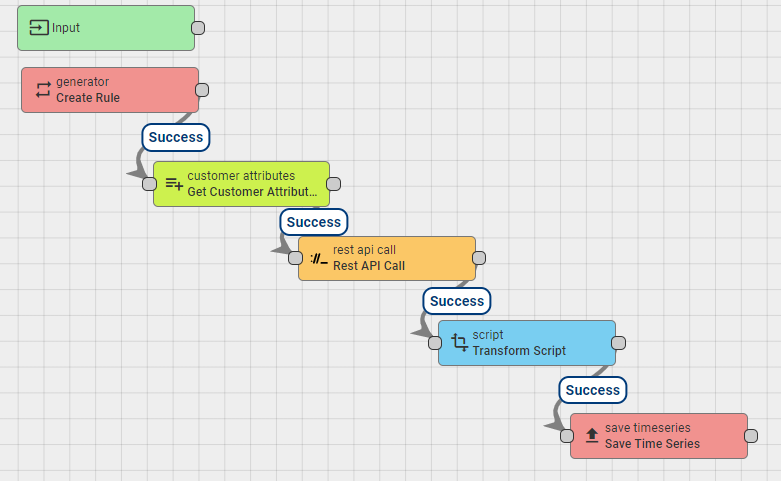
This is what the whole rule chain looks like.
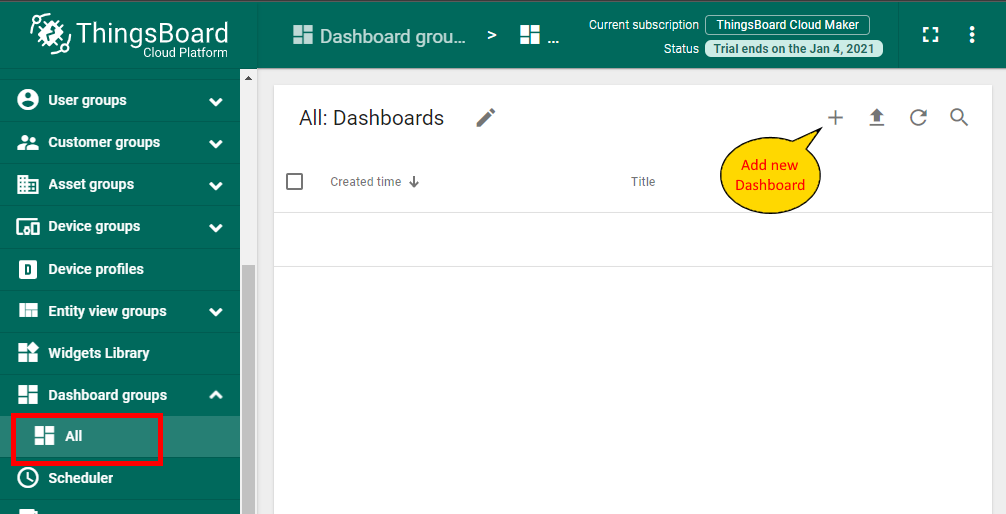
Now we want to show this on a dashboard.
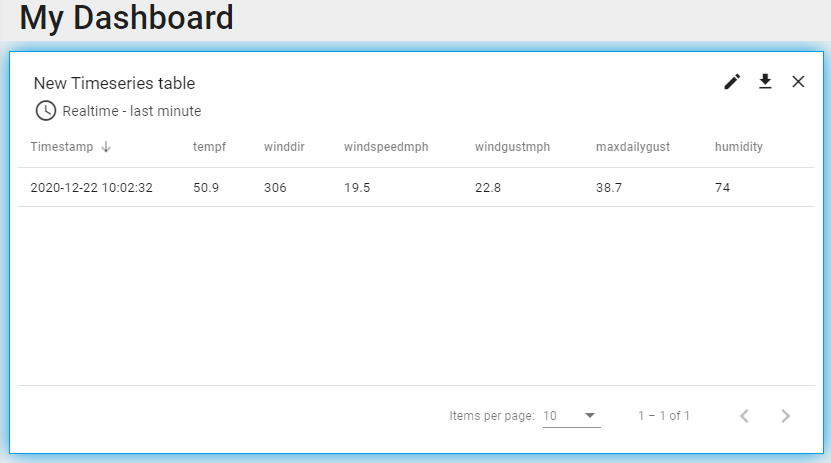
Create a new Dashboard. I am just naming it “My Dashboard”
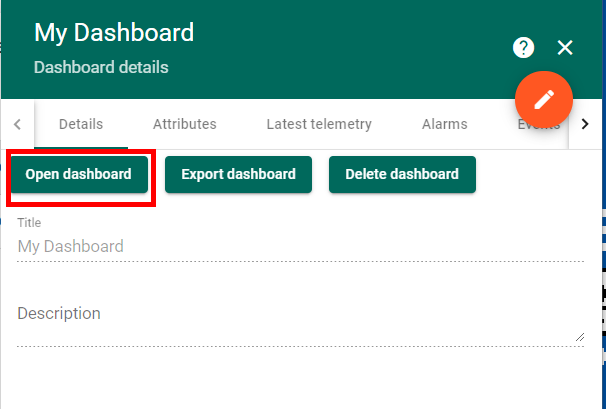
Once the dashboard is created, open it.
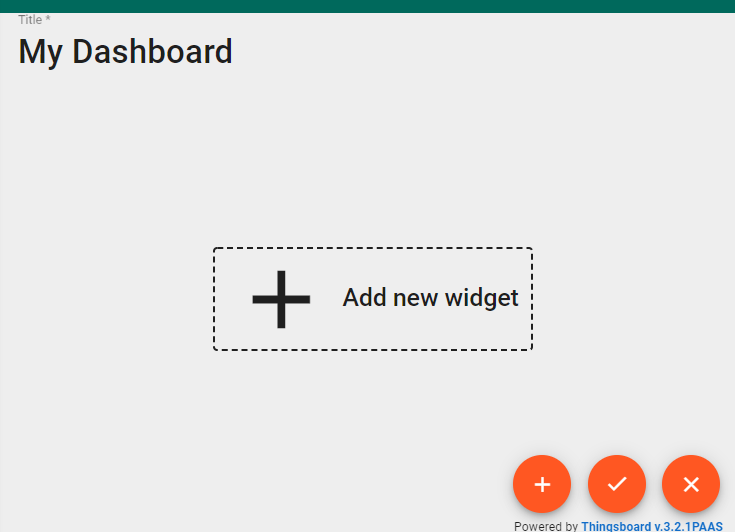
Lets add a widget.
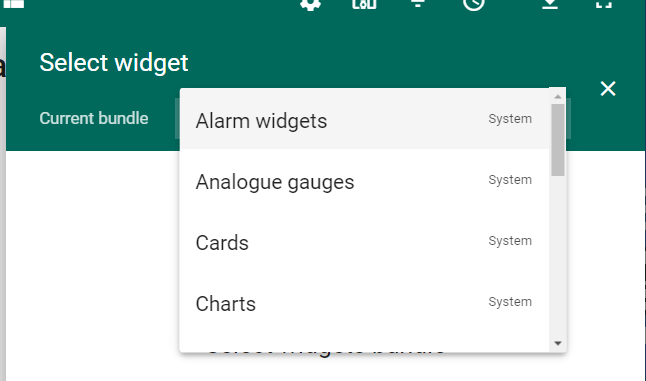
Choose the Cards widget bundle.
I am going to use the timeseries table.
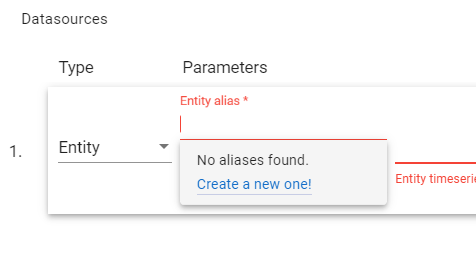
You need to link the widget to data. So, what we are going to do is create a new alias to data since we dont have one already.
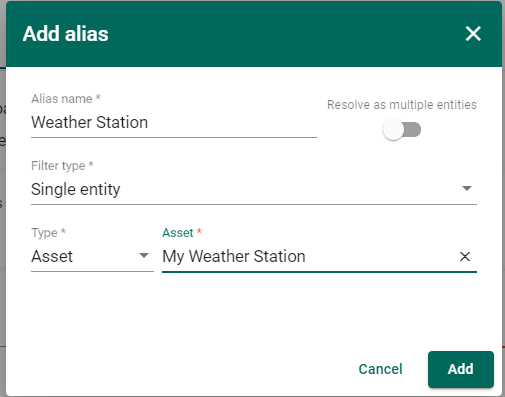
We are going to give it an alias name. This is just a name we can now use in this dashboard to refer to data. I am going to use a “single entity” type of filter. And I am going to point it to my Weather Station asset.
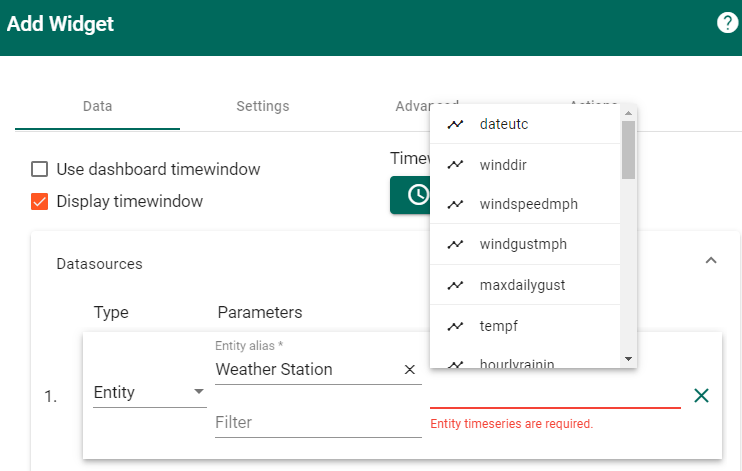
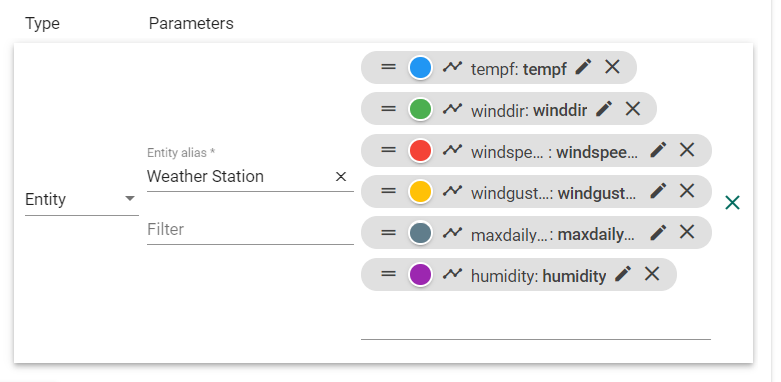
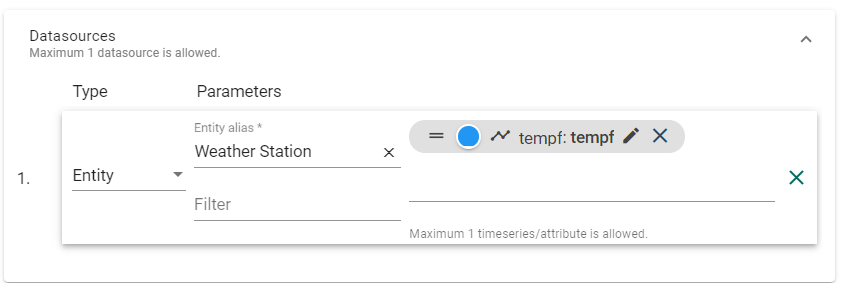
After you have pressed add to save the alias, you can then use that alias in your datasource. I am going to point to the Entity alias for “Weather Station” and then choose which data variables I want to show on my table.
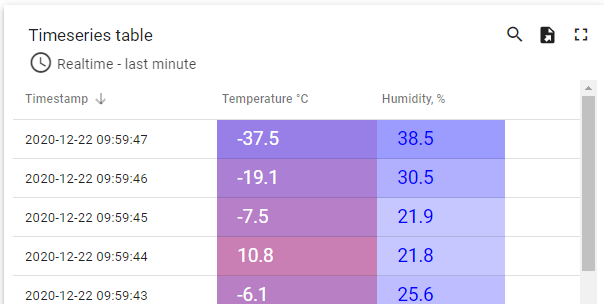
I choose several variables for temperature, wind direction and speed, etc. You can drag the variables around to change the order in the table. You can also click on the pencil to edit things like header, color, etc.
After I save that, I can then see the data showing up in my timeseries table on my dashboard.
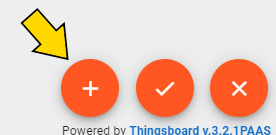
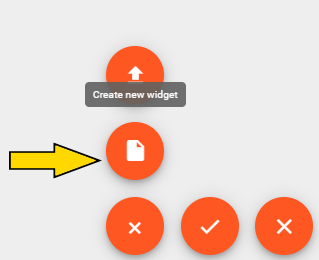
I want to do another one a bit more graphical. So, hit the plus button to add another widget.
Lets create the new widget.
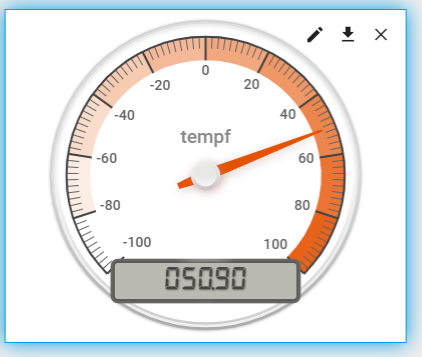
What I did then was choose Analog gauge and choose the temperature gauge and then pointed the tempf field (temperature F) to be displayed.
And now I have a nice gauge. You can add as many things as you want. As well as bring in other data from other devices and assets. We also use water temperature from an ESP32 device out off of our dock to create a fully comprehensive view of weather and conditions without just getting data from one weather station.
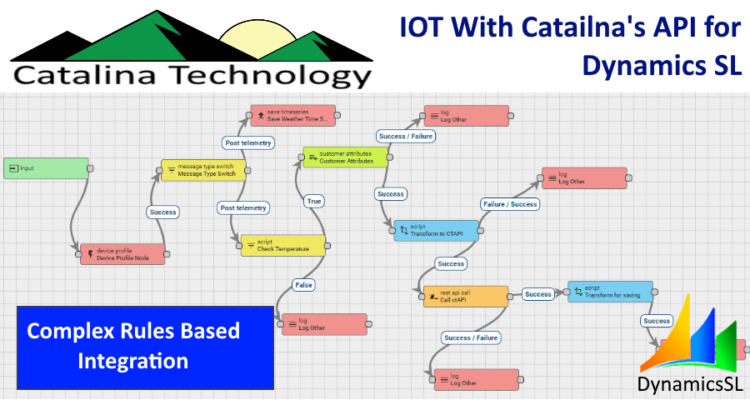
Catalina’s API for Dynamics SL can be used for many things. We can retrieve all types of data from SL. We can also save transactions to SL. In this demo I did for several folks, I am taking sensor data and pushing it through an advanced rules based engine to create Service Calls in Dynamics SL.
While this demo highlights Dynamics SL, we could just as easily use these same types of rules based development to integrate with other systems like CRM, helpdesk, field service, etc. We can monitor all types of things like temperature, barometric pressure, vibrations (helpful if you an HVAC company and need to monitor your customer’s properties for problems), humidity, ambient light, flooding, and more.
When I run the script to install Catalina’s stored procedures, I get several messages like this:
The module ‘xct_spDSLXXXXXXXXX‘ depends on the missing object ‘xct_spDSLYYYYYYYYY‘. The module will still be created; however, it cannot run successfully until the object exists.
Don’t worry, those are not errors. They are just warnings that the stored procedure is referencing another stored procedure that hasn’t been created yet. It will get created later in the script.
You may want multiple users access Catalina’s API for Dynamics SL. When using the RESTful version of Catalina’s API, you can do this by managing the APIKEYSCONFIGFILE.xml (usually located on the web server at c:\inetpub\xctFiles\config — But could be somewhere else depending on the installation. Check with your installer)
NOTE: before doing any changes to Catalina configuration, make sure you backup the files you are updating first.
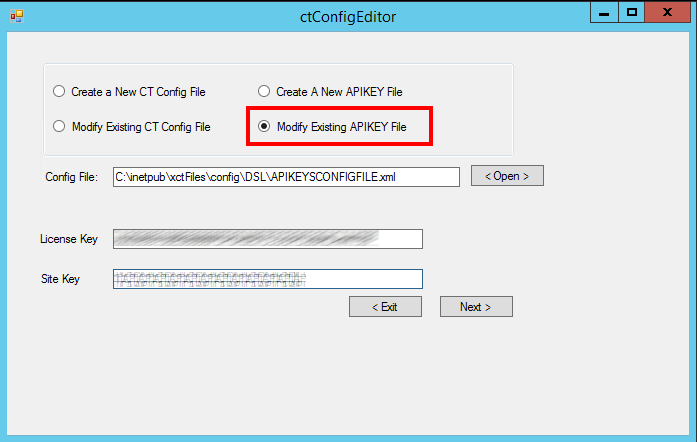
The APIKEYSCONFIGFILE.xml can be managed by a Catalina management tool called ctConfigEditor. (Normally located in C:\inetpub\xctFiles\ctConfigEditor — but could be in a different location based on installation). Once the ctConfigEditor is loaded, you will see a screen similar to this:
You will need to get your License Key and Site Key (found in the web.config file of the Catalina API for SL. — usually located c:\inetpub\xctFiles\web\ctDynamicsSL or c:\inetpub\wwwroot\ctDynamicsSL but could be located somewhere else based on installation). You will also need to point to the proper Config File.
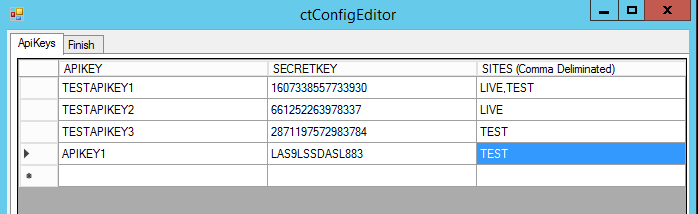
Once you have loaded the APIKEYSCONFIGFILE.xml with the proper license key and site key, you will see a screen similar to this:
Here you can manage Authentication logins for the RESTful API. In the above example, there are 4 different keys. You can add new ones by just adding a line. and you can delete keys by clicking on the line item and hitting the delete key.
The columns of these API Keys are defined:
APIKey: the username of the authentication
SECRETKEY: The password of the authentication
SITES: a comma delimited list of sites the user has access to
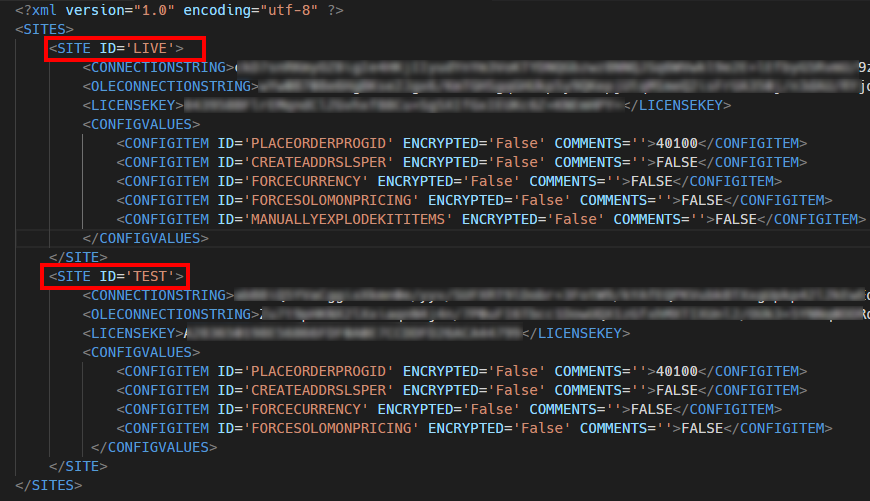
(NOTE: A site is a configuration pointer. If you look at your DSLCONFIGFILE.XML file — usually in the same location as the APIKEYSCONFIGFILE.xml — you will see different Sites and SiteID’s. It is that SITE ID that you would put in the SITES column. If you want to give a user access to more than one site, you would then list all the sites comma delimited. Below is an example of what a DSLCONFIGFILE.XML looks like. You can see that there are two sites: LIVE and TEST.
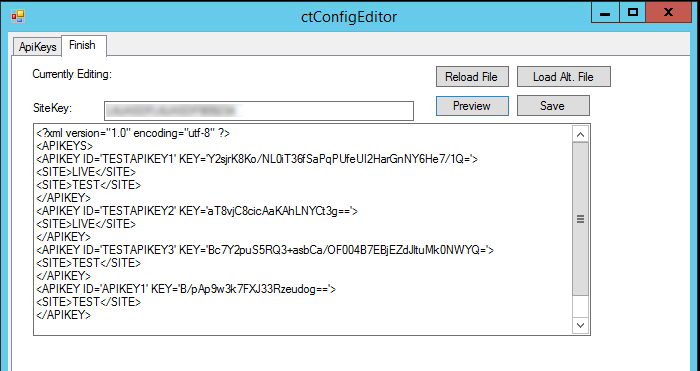
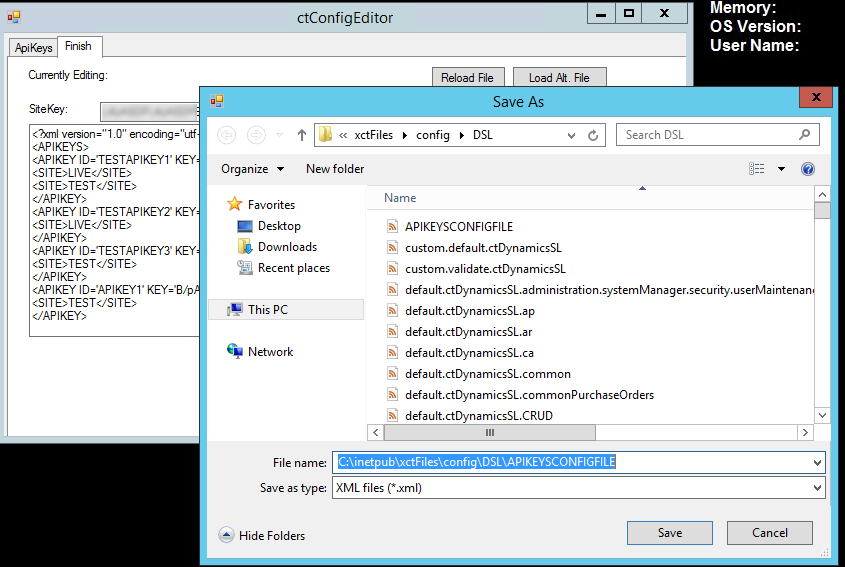
Once you have finished editing your API Keys in the ctConfigEditor tool, you can then finish it and save by clicking on the “Finish” tab. You can click the Preview button to see what your APIKeys file will look like. You can also Save your file by clicking on the Save button.
Clicking on the save button will allow you to save to a file. You will need to save it on top of the existing APIKEYSCONFIGFILE.XML (NOTE: make sure you have this file backed up before overwriting it).
After you save the file, you will also need to reload your Application Pool in IIS to make the change stick.
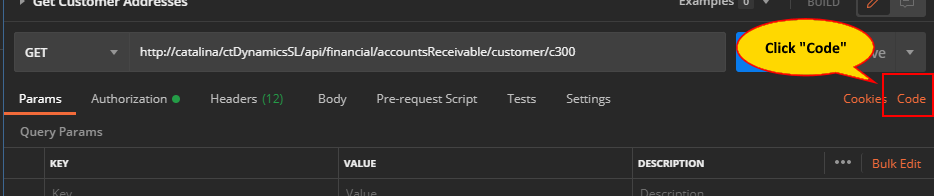
There are times that you might have questions or problems when developing using an API. You contact support and they will ask you to send you the “payload” you are using when communicating with the Catalina API for Dynamics SL. The easiest way to do this, if you are using Postman as your testing environment, is to export the code. This is done in these simple steps
Step 1: Got to your postman tab you are making the API call from and click on the “Code” link on the right of the screen
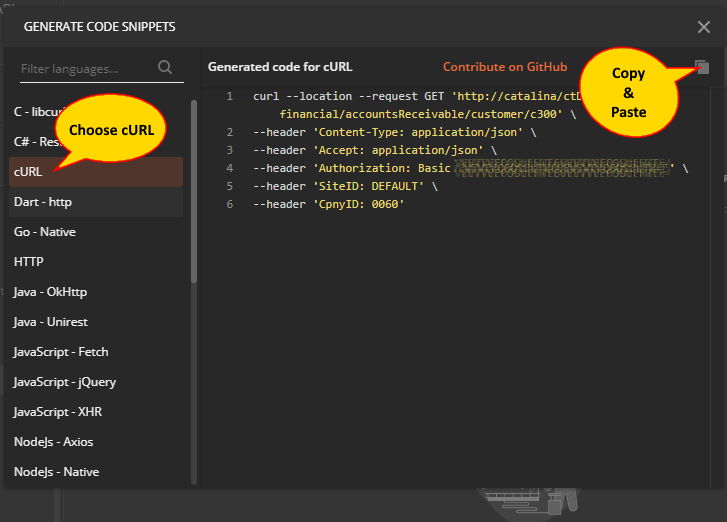
Step 2: On the popup, click on cURL and then copy the text provided, paste it into an email, and send to Support.
We are changing the name of SL QuickPay to SL QuickCollect to avoid confusion with other systems out there. Plus, we think that since we are focused on the collection side of things of AR. Because of this QuickCollect has much more meaning.
SL QuickCollect is a Catalina Technology solution that allows you to email or SMS message out a simple link to your customer as a request for payment. The customer can then click on the link and are sent to a payment page without any portal login required. This lowers the barrier of entry for you to collect from your customers and get paid faster.
There are several settings that you can set to log messages to a log file for Catalina’s API for Dynamics SL.
Look in your web.config (normally in c:\inetpub\xctFiles\web\ctDynamicsSL or c:\inetpub\wwwroot\ctDynamicsSL — but could be located in a different location based on your installation). There will be 3 variables that are important:
<!--def:DEBUGMODE: TRUE/FALSE default:FALSE-->
<add key="DEBUGMODE" value="TRUE" />
<add key="DEBUGLEVEL" value="VERBOSE" /><!--BASIC,VERBOSE-->
<!--def:ERRORLOGFILE: full path to the txt file to writeout error and status messages-->
<add key="ERRORLOGFILE" value="C:\\inetpub\\xctFiles\\errorLogs\\DSLerrorLogFile.txt"/>
DEBUGMODE: There are 2 different settings for this
TRUE if you want to have messages saved to a logfile.
FALSE if you don’t want to have messages saved to a logfile. Normally DEBUGMODE would be set to FALSE for performance reasons.
DEBUGLEVEL: There are 2 different levels that you can set
VERBOSE: This will save extra information to the logfile. This will create a larger file but will store more information about what is going on in the service.
BASIC: This generally stores just errors and less information
ERRORLOGFILE: This is the location of the logfile. NOTE: You need to make sure you “escape” this value. So, when you have a backslash (\), make sure you do 2 backslashes (\\) so that it wont create an invalid XML string.
SLQuickCollect is Catalina’s solution that allows you to email or SMS message out a simple link to your customer as a request for payment.
Custom properties are a way to personalize the emails that go out to the customer. As well as the payment page and receipts they see. You can have an unlimited number of parameters with whatever text you want to send to the customer. And you can place it anywhere you want on the email and page templates.
Here is a quick demo on how you can do this via a RESTful API. And how to modify the templates to display the parameters.
Below is an example of a payload that you would send to the SLQuickCollect API.
CustID: The Customer ID of the customer you are sending the payment request to.
Amount: The amount you want to collect
PaymentEmailList: A delimited list of emails that the request is going to go to.
Properties: This is a list of properties as Name/Value pairs. You can create as many of these properties as you want. And then you can display them in the email, payment page, receipt email, and receipt page templates any way you want.
When you want to display a custom property on a template page, you use this ASP.NET format:
<%=getProperty(“PropertyName“)%>
So, if the property name is “COMMENTS”, you would use this: